TLS10GC-IP Demo on KR260 Instruction
1.4.2 Speed and Duplex Setting
1.4.3 Network Properties Setting
Design Gateway presents a demonstration showcasing the TLS10GC-IP core’s ability to offload encryption and decryption tasks during secure browsing with the Lynx web browser on the Kria KR260 Robotics Starter Kit. A pre-configured SD card image is provided, enabling users to easily deploy the setup on the KR260 and achieve higher data transfer speeds while preserving the same user experience as traditional systems.
This document provides instructions for using the accelerated Lynx web browser powered by TLS10GC-IP on the KR260. It is divided into two main sections: environment setup and demonstration.
1 Environment Setup
An overview of the test environment is shown as Figure 1. The setup includes the KR260 board and a test PC connected to the same gateway to enable communication with each other and access to the internet. Users can test the normal operation of the Lynx web browser for internet browsing and measure download speeds by connecting to a Node.js server running on the test PC. This setup facilitates data transfer through the 10G Ethernet path for performance evaluation.
1.1 Test Environment
To operate TLS10GC-IP demo on KR260, please prepare following test environment.
1) FPGA development boards (KR260 board).
2) Test PC with 10 Gigabit Ethernet or connecting with 10 Gigabit Ethernet card.
3) 10 Gb Ethernet cable:
a) 10 Gb SFP+ Passive Direct Attach Cable (DAC) which has 1-m or less length
b) 10 Gb SFP+ Active Optical Cable (AOC)
c) 2x10 Gb SFP+ transceiver (10G BASE-R) with optical cable (LC to LC, Multimode)
4) Micro USB cable for UART connection connecting between KR260 board and Host PC.
5) Serial console software such as TeraTerm installed on PC. The setting on the console is Baud rate=115200, Data=8-bit, Non-parity and Stop=1.
6) SD card image provided by Design Gateway for running on KR260.
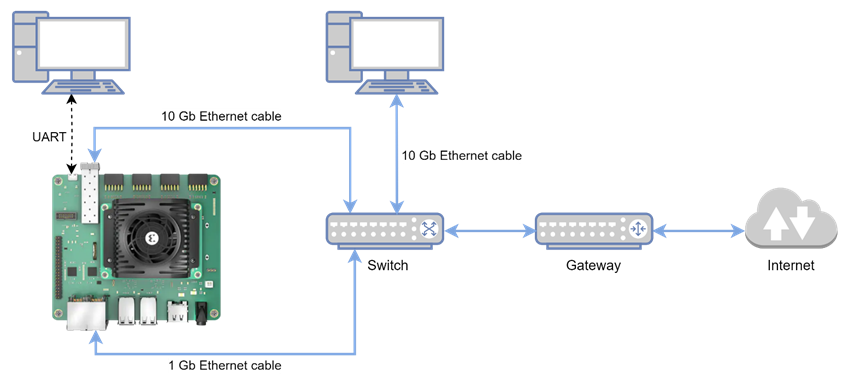
Figure 1 TLS10GC-IP demo on KR260 board test environment
1.2 KR260 Setup
After flashing the provided image to the SD card, boot the KR260 with the card.
Default login credentials:
username: ubuntu
password: kriakr260
Set up the system environment using the following commands:
1) Unload the default hardware application bitstream.
sudo xmutil unloadapp
2) Load the hardware application bitstream named DGTLS10GC.
The DGTLS10GC application includes the hardware accelerators used in this demonstration.
sudo xmutil loadapp DGTLS10GC
3) Load the udmabuf kernel driver and specify the size of the DMA buffer in bytes. In this demo, udmabuf0 is allocated 1MB to use as Tx Buffer and udmabuf1 is allocated 1MB to use as Rx Buffer.
sudo insmod /home/ubuntu/udmabuf/u-dma-buf.ko udmabuf0= 1048576 udmabuf1=1048576
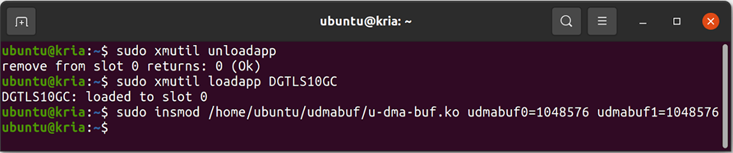
Figure 2 Example result for loading application on KR260 board
1.3 Lynx Web Browser Setup
After configuring the Ubuntu environment on the KR260, users can utilize the Lynx web browser to browse web servers. Based on TLS10GC-IP specification, the DGTLS10GC application, which includes TLS10GC-IP, can offload CPU workloads when connecting to a server that supports TLS1.3 using TLS_AES_256_GCM_SHA384 cipher suite.
This demonstration showcases how Lynx can be used to connect to the internet via the HTTPS protocol using the DGTLS10GC hardware application. The Ethernet interface and hardware acceleration settings can be configured via the command line by defining the ECONN and HW_ENABLE parameters:
When ECONN=10, Lynx establishes TCP and TLS connection through the 10G Ethernet port. Otherwise, it defaults to the 1G Ethernet port, leveraging the socket kernel for TCP connections and OpenSSL for TLS connections in the standard workflow.
For a 10G Ethernet connection with hardware acceleration, setting HW_ENABLE=1 enables the TLS10GC-IP core to offload encryption and decryption tasks. If HW_ENABLE is set to any other value, Lynx will use OpenSSL for TLS tasks. To connect via the 10G Ethernet interface, users must configure the necessary network parameters by editing the DG.cfg file located at /home/ubuntu/tool/lynx/etc/DG.cfg. The parameters are described below:
GATEWAY_IP
Description: Specifies the gateway IP address of the 10G Ethernet interface in dot-decimal notation.
Default Value: 192.168.11.2
FPGA_IP
Description: Specifies the IP address of the 10G Ethernet interface in dot-decimal notation.
Default Value: 192.168.11.84
FPGA_MAC
Description: Specifies the MAC address of the 10G Ethernet interface in dot-decimal notation.
Default Value: 80.00.11.22.33.44
Remark:
- This demonstration supports TLS and TCP/IP protocols via the 10G Ethernet interface. Lynx may communicate using other protocols via the 1G Ethernet interface.
- To minimize additional effort in developing a device driver, users can use existing open-source device drivers to interface with the hardware. This demo uses the /dev/mem and /dev/udmabuf device drivers.
1.4 PC Setup
When connecting to the internet, data transfer may be slower due to external network conditions. By connecting to a server within the same subnet, we can ensure that data is transferred exclusively through the 10G Ethernet, allowing for controlled and consistent testing conditions.
This demonstration showcases running Node.js server on Test PC. Before running demo, please check the network setting on PC. The example of setting 10 Gb Ethernet card is described as follows.
1.4.1 IP Setting
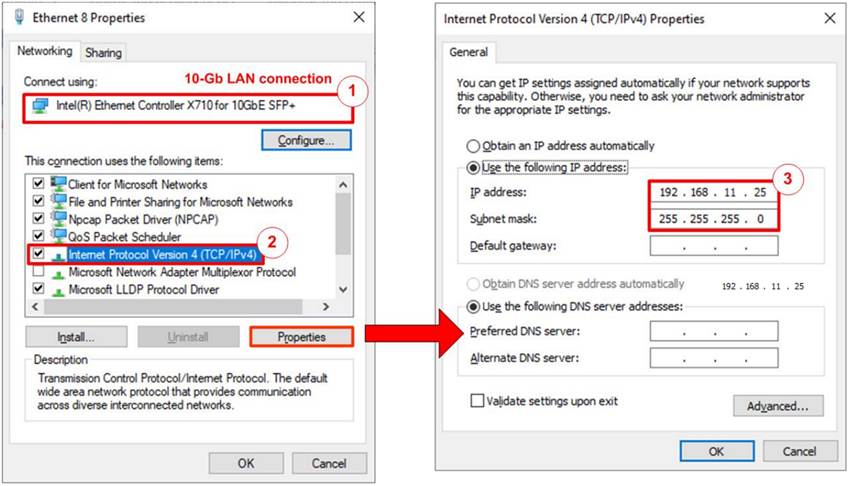
Figure 3 Setting IP address for PC
1) Open Local Area Connection Properties of 10 Gb connection, as shown in the left window of Figure 3.
2) Select “TCP/IPv4” and then click Properties.
3) Set IP address = 192.168.11.25 and Subnet mask = 255.255.255.0, as shown in the right window of Figure 3.
1.4.2 Speed and Duplex Setting
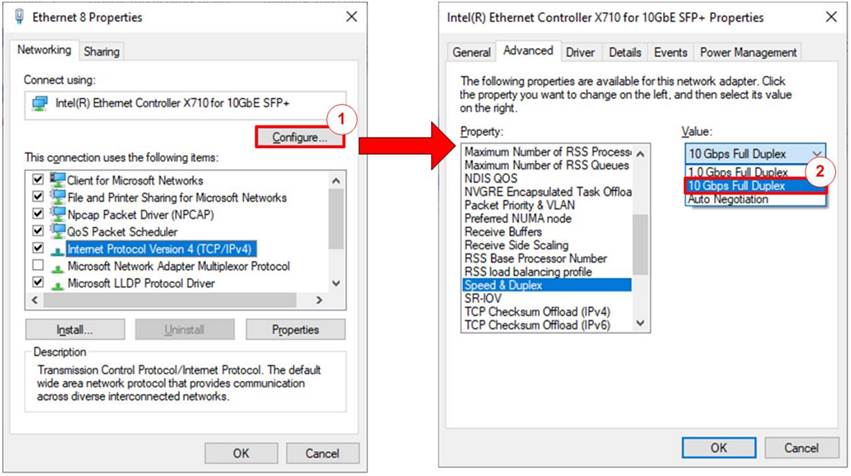
Figure 4 Set Link Speed = 10 Gbps
1) On Local Area Connection Properties window, click “Configure”, as shown in Figure 4.
2) On Advanced Tab, select “Speed and Duplex”. Set the value to “10 Gbps Full Duplex” for running 10 Gigabit transfer test, as shown in Figure 4.
1.4.3 Network Properties Setting
Some of network parameter setting may affect to network performance. The example of network properties setting as follows.
1) On “Interrupt Moderation” window, select “Disabled” to disable interrupt moderation which would minimize the latency during transferring data, as shown in Figure 5.
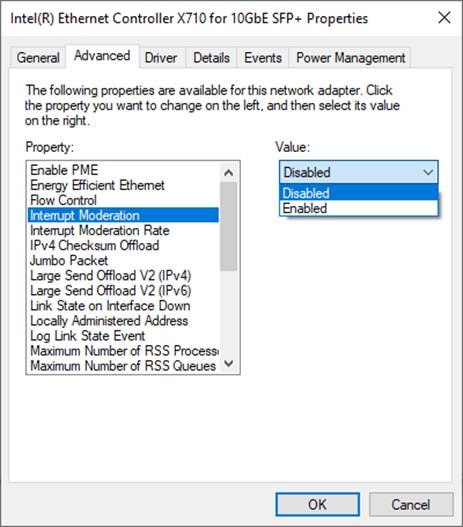
Figure 5
Interrupt Moderation
2) On “Interrupt Moderation Rate” window, set value to “OFF”, as shown in Figure 6.
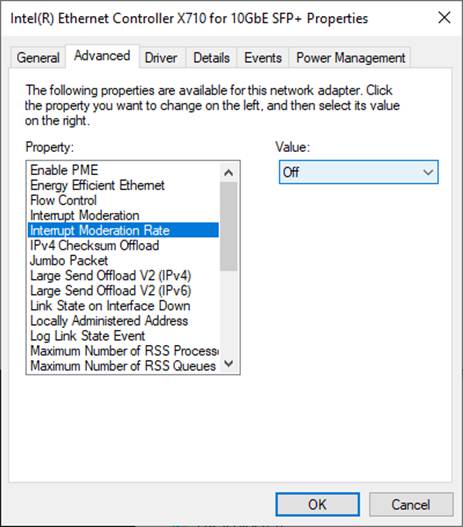
Figure 6 Interrupt Moderation Rate
3) On “Jumbo packet” window, set value to “9014 Bytes”, as shown in Figure 7.
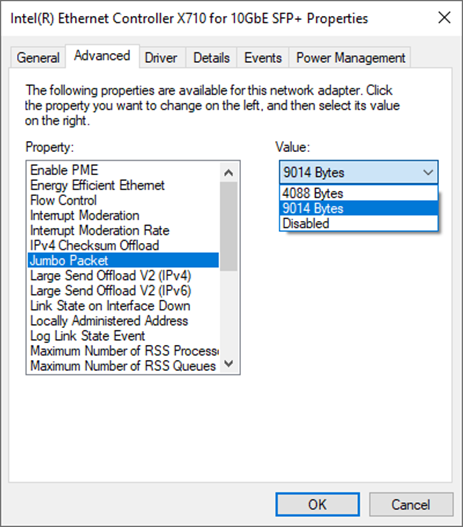
Figure 7 Jumbo packet
4) On “Receive Buffers” window, set value to the maximum value, as shown in Figure 8.
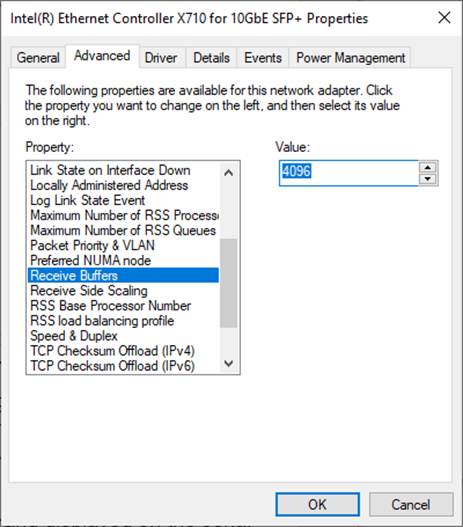
Figure 8 Receive Buffers
5) On “Transmit Buffers” window, set value to the maximum value, as shown in Figure 9.
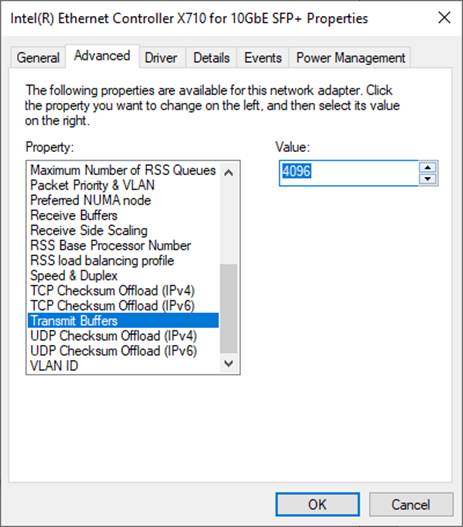
Figure 9 Transmit buffers
1.5 Node.js Server Setup
In this demonstration, a sample server is created using Node.js. The server opens port 60001 for HTTPS connection. The required files for running the server are provided in server folder, which contains the following:
1) serverDemo.js: The main script for running server.
2) key.pem and certificate.pem: Sample RSA key information and the server’s certificate.
3) server/uploads: A folder for storing files uploaded from the client.
4) server/log: A folder containing the following files:
a) Example HMTL pages: DG.html, bike.html, pinkpanther.html and rex.html. Users can add files to server/log folder to be the resource for downloading.
b) submit.html: Allows Lynx web browser to upload data to the server, which is then saved in uploads folder.
c) testSpeed.html: Enables Lynx web browser to upload data to the server for performance testing.
When serverDemo.js is executed*, server’s IP address and port number are displayed on console, as shown in Figure 10.
Caution
* Before running serverDemo.js, ensure that the 10Gb Ethernet connection is active. This step is essential for the server to detect and utilize the 10Gb Ethernet interface.
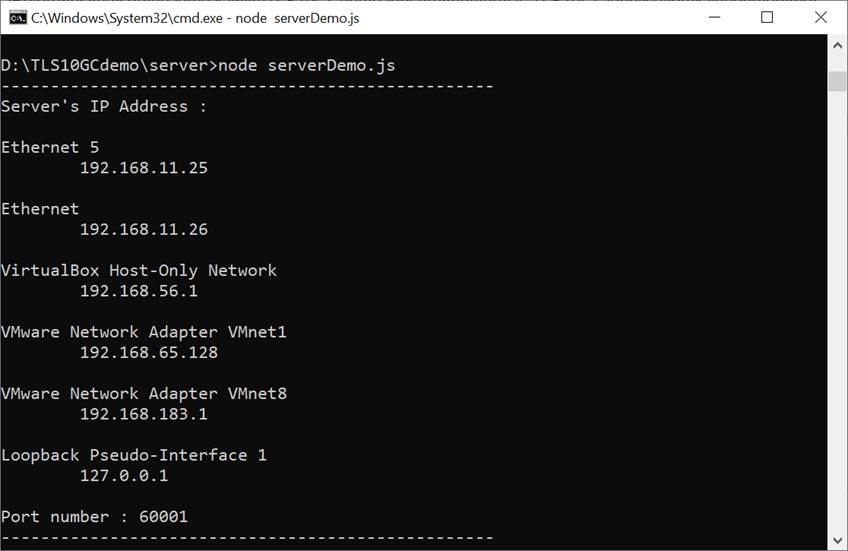
Figure 10 Server console when serverDemo.js is executed
In case of client cannot access node.js server, please check firewall setting as below,
1) Go to Windows Defender Firewall with Advanced Security
2) Click on “Inbound Rules”
3) Search for “Node.js JavaScript Runtime” and open its properties
4) Go to “Protocols and Ports” tab and set Protocol type = TCP, Local port = Specific Ports that server on PC open. By default, the sample node.js server opens port 60001. Local port number is set to 60001, as shown in Figure 11.
5) Go to “Advanced” tab and mark the profile boxes that match the network profile of ethernet card, as shown in Figure 12.
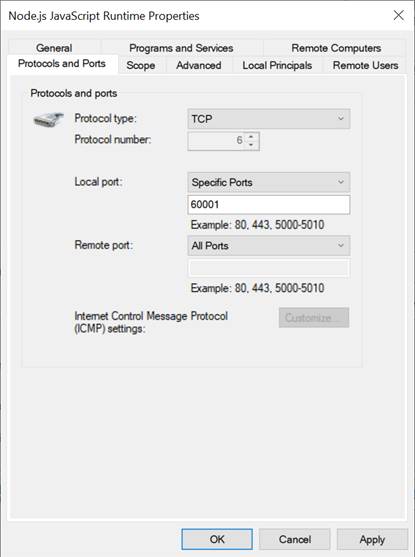
Figure 11 Protocols and Ports setting

Figure 12 Advanced setting
Downloading Data from the server
Clients can download data patterns or existing files in the server/log folder by sending a GET request with URL.
For downloading data pattern, there are 4 data patterns which are increasing binary, decreasing binary, increasing text and decreasing text pattern. When a server receives a GET request, the requested data pattern and its length are displayed on the server console, as shown in Figure 13.

Figure 13 Server console when client download data pattern
For downloading an HTML file from the server/log folder, the client sends a GET request with the filename in the URL. The file path of the requested data is displayed on the server console, as shown in Figure 14.

Figure 14 Server console when client download ./log/DG.html
Uploading Data to the server
Clients can upload data to the server using a POST request followed by the uploaded data.
If a client uploads data via the submit.html page, the request is sent to the /submit URL. The server saves the uploaded file to the uploads folder. After the transfer is complete, the saved filename and upload speed are displayed on the server console, as shown in Figure 15.
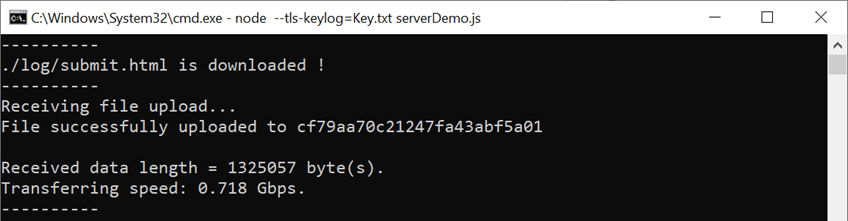
Figure 15 Server console when client upload data via submit.html page
To achieve maximum transfer speed, clients can request the testSpeed.html page and upload data to the /upload URL. The server does not save the uploaded data to a file. Instead, it counts the received data and calculates the transfer speed. After the transfer is complete, the upload speed is displayed on the server console, as shown in Figure 16.
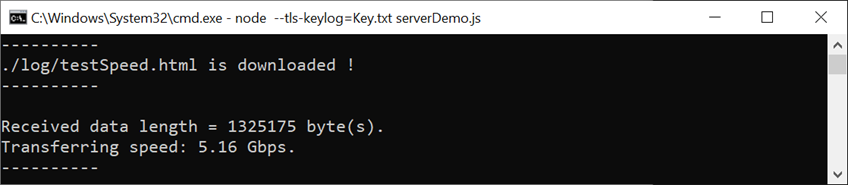
Figure 16 Server console when
client upload data via testSpeed.html page
2 Demonstration
2.1 Website Browsing
This demonstration confirms that Lynx functions as expected via the 10G Ethernet interface with the DGTLS10GC hardware accelerator, maintaining the same behavior as its original 1G Ethernet setup.
Users can browse websites using the Lynx web browser. For example, to visit www.google.com, users can execute the following command:
lynx https://www.google.com
The Lynx terminal will render the HTML page for www.google.com. Users can enter search keywords in the provided input field and press Enter to navigate to the search results page, as shown in Figure 17.
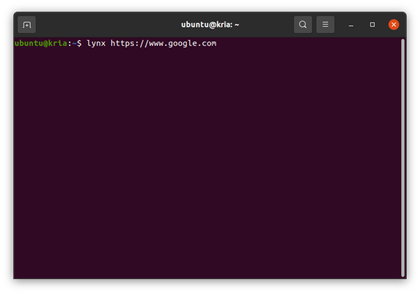
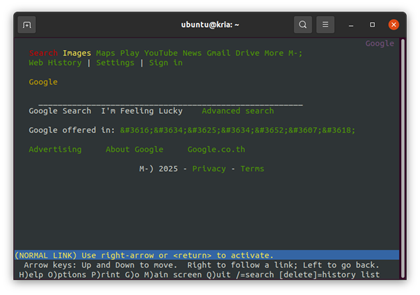
Figure 17 Example Lynx UI browsing with 1G Ethernet connection
To use the 10G Ethernet connection, users should set ECONN=10 when executing Lynx. The browsing experience remains the same as when using the 1G Ethernet interface. Figure 18 shows the console output when the user executes the following command:
sudo ECONN=10 HW_ENABLE=0 lynx https://www.google.com
In this mode, Lynx connects to the network through the 10G Ethernet interface but disables the TLS10GC-IP. As a result, Lynx relies on OpenSSL to handle encryption and decryption of the payload.
Since this demonstration uses the /dev/mem driver to interface with hardware, users must execute Lynx with root privileges to obtain the necessary permissions for hardware access.
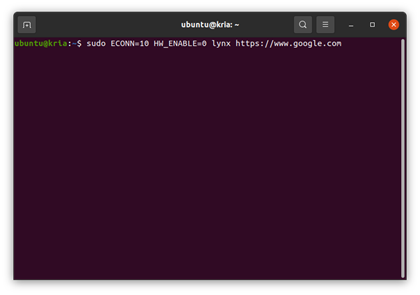

Figure 18 Example Lynx UI browsing with 10G Ethernet connection without hardware accelerated
To use the 10G Ethernet connection with hardware acceleration, users should set ECONN=10 and HW_ENABLE=1 for enabling the TLS10GC-IP to offload encryption and decryption tasks. This can be done by executing Lynx with the following command:
sudo ECONN=10 HW_ENABLE=1 lynx https://www.google.com
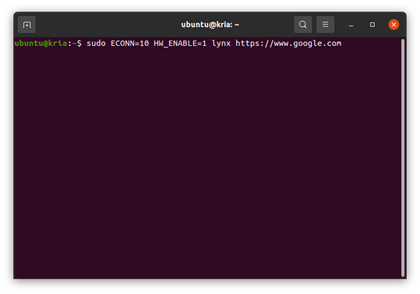
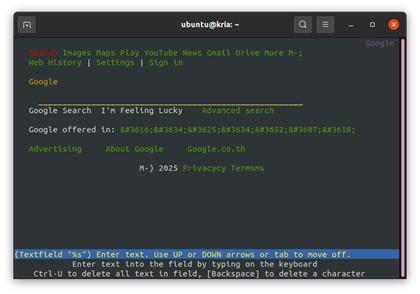
Figure 19 Example Lynx UI browsing with 10G Ethernet connection with hardware acceleration
2.2 Data Download from Server
When connected to the internet, data transfer may vary due to external network conditions. B y establishing a connection within the same subnet, we ensure that data is transferred exclusively over the 10G Ethernet, allowing for controlled and consistent testing conditions.
This section describes the test procedure and presents the results for different configurations, evaluating the impact of hardware acceleration on Lynx’s data transfer speeds and CPU utilization.
2.2.1 Test Procedure
Users can access an HTML page hosted on the server by using the following URL format:
https://<server’s IP>:<server’s Port number>/download/log/<filename>
Lynx will render the received data as an HTML page. An example of the Lynx interface displaying the DG.html file downloaded from the server via 10G Ethernet with hardware acceleration enabled is shown in Figure 20.
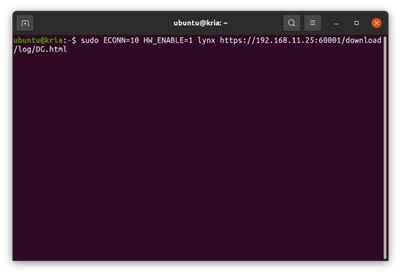
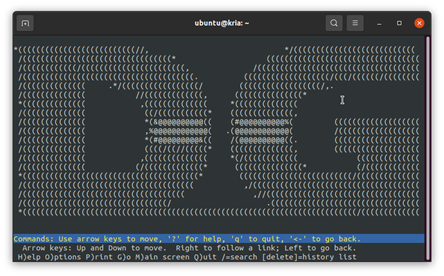
Figure 20 Example Lynx UI downloading DG.html
Users can connect to the example Node.js server to request a data pattern of a specified size (in bytes) by using the following URL format:
https://<server’s IP>:<server’s port>/download/<pattern>/<size>
In this demonstration, the Node.js server supports the following four data patterns:
b1: Increasing binary pattern
t1: Increasing text pattern
b0: Decreasing binary pattern
t0: Decreasing text pattern
To mitigate the bottleneck during downloads in Lynx, users can configure the temporary file location to a RAM Disk. This is done by setting LYNX_TEMP_SPACE=<path to your RAMDisk>. In this example, the RAM Disk is mounted at /tmp/ramdisk.
2.2.2 Test Results
Lynx provides a progress bar that displays download speeds during data transfers. Users can monitor the download performance while requesting data patterns from the Node.js server. Examples of the progress bar under different scenarios are shown in Figure 21 to Figure 23.
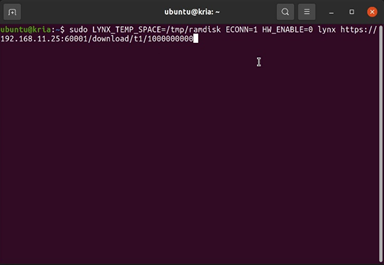
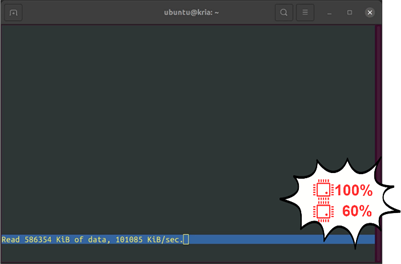
Figure 21 Example of Lynx UI downloading 1GB data via 1G Ethernet
For the 1G Ethernet interface (Figure 21), a 1GB increasing text pattern was downloaded. The CPU managed both TCP connections (via sockets) and TLS encryption/decryption (via OpenSSL). The transfer speed averaged 0.7 Gbps, with 100% CPU utilization on one core and 60% on another core, as observed using an interactive system monitor. The fully saturated core created a bottleneck, limiting overall performance.

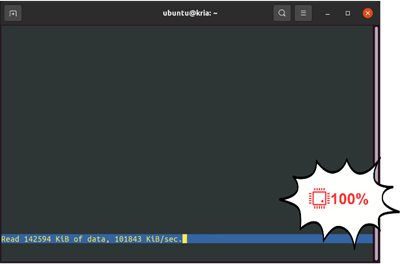
Figure 22 Example of Lynx UI downloading 1GB data via 10G Ethernet with hardware disabled
For the 10G Ethernet interface with hardware acceleration disabled (Figure 22), a similar 1GB data transfer was conducted. While the TCP workload was offloaded to the TOE10GLL-IP core, the CPU still handled encryption and decryption tasks using OpenSSL. The transfer speed remained 0.7 Gbps, with one CPU core fully saturated at 100% utilization. This demonstrated that although TCP offloading provided some relief, the encryption and decryption tasks continued to be a bottleneck, preventing higher transfer speeds.
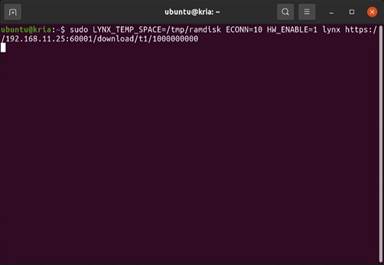
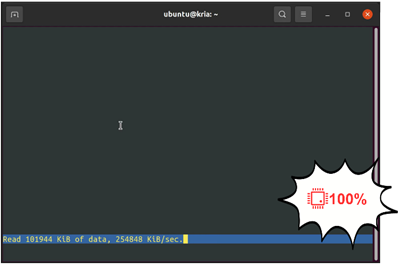
Figure 23 Example of Lynx UI downloading 1GB data via 10G ethernet with hardware enabled
With hardware acceleration enabled, both TCP processing (TOE10GLL-IP) and TLS encryption/decryption (TLS10GC-IP) were offloaded from the CPU. This doubled the transfer speed to 1.4 Gbps, significantly improving performance. Although one CPU core still reached 100% utilization, the offloading allowed the system to handle additional workloads more efficiently.
2.3 Data Upload to Server
This section describes the test procedure and presents the results for uploading data using different configurations.
2.3.1 Test Procedure
Uploading with submit.html
To upload and save a file on the server, users must request the submit.html page using the following URL format:
https://<server’s IP>:<server’s Port number>/download/log/submit.html
Lynx will render the submit.html page, allowing users to select a file from their device storage and press the Submit button to upload it as shown in Figure 24.
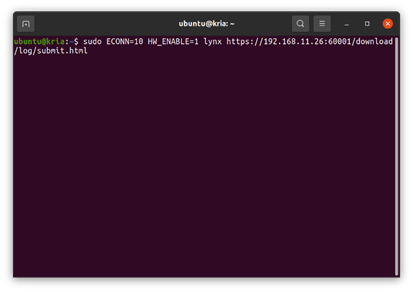
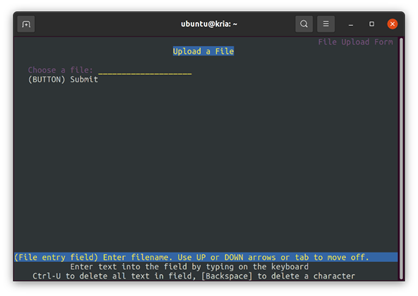
Figure 24 Example of Lynx UI rendering submit.html
After the upload is complete, the saved filename is displayed on the terminal as shown in Figure 25.
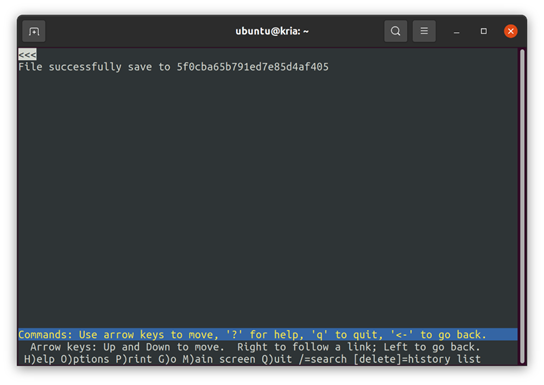
Figure 25 Example of Lynx UI after finishing submitting
Uploading with testSpeed.html
To test upload speed, users must request the testSpeed.html page using the following URL format:
https://<server’s IP>:<server’s Port number>/download/log/testSpeed.html
Lynx will render the testSpeed.html page, allowing users to select a file from their device storage and press the Upload button as shown in Figure 26.
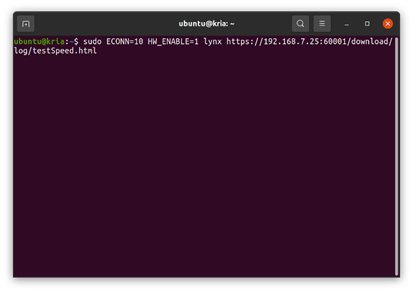
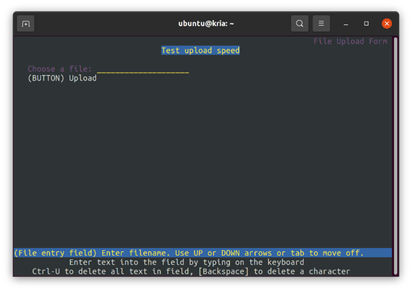
Figure 26 Example of Lynx UI rendering testSpeed.html
Once the upload is complete, only “File successfully uploaded” message is displayed on the terminal as shown in Figure 27.
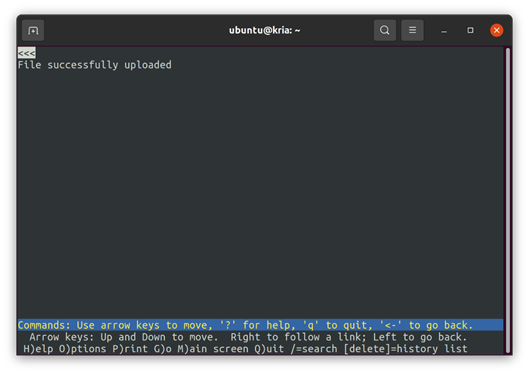
Figure 27 Example of Lynx UI after finishing uploading
Remark:
Lynx reads the entire file to construct the POST request, which may take time, especially for large files before starting transfer data.
2.3.2 Test Results
For uploading, the transfer speed is displayed on the server’s console. Examples of upload speed under different scenarios are shown in Figure 28 to Figure 30.

Figure 28 Example of Lynx UI uploading 1GB data via 1G Ethernet
For the 1G Ethernet test (Figure 28), a 1GB file was uploaded. The CPU managed both TCP and TLS encryption/decryption using OpenSSL. The transfer speed averaged 0.9 Gbps, with 100% CPU utilization, creating a bottleneck and limiting performance.

Figure 29 Example of Lynx UI uploading 1GB data via 10G Ethernet with hardware disabled
For the 10G Ethernet test without hardware acceleration (Figure 29), TCP workloads were offloaded to the TOE10GLL-IP core, while TLS encryption/decryption was still handled by the CPU. The transfer speed increased to 2.2 Gbps, but CPU utilization remained at 100%, indicating encryption/decryption was the limiting factor.

Figure 30 Example Lynx UI uploading 1GB data via 10G ethernet with hardware enabled
With hardware acceleration enabled (Figure 30), the CPU offloaded both TCP tasks to TOE10GLL-IP and encryption/decryption tasks to TLS10GC-IP. The upload speed increased to 4.9 Gbps, while CPU utilization remained at 100% on one core. By offloading TLS encryption/decryption, the CPU was free to manage other tasks, improving overall efficiency.
In conclusion, this demonstration showcases how TLS10GC offloads encryption and decryption tasks when browsing securely via the Lynx web browser. With minimal modifications to the OpenSSL library and Lynx application on Ubuntu, users can achieve higher data transfer speeds while maintaining the same user experience as with existing application.
3 Revision History
|
Revision |
Date (D-M-Y) |
Description |
|
1.01 |
3-Mar-25 |
Revise and add “Data Upload to Server” section |
|
1.00 |
31-Jan-25 |
Initial version release |