3 Running the Demo via Serial Console
4.3 SHA3 / SHAKE Variant Selection
This document provides step-by-step instructions for demonstrating the operation of the SHA3 IP Core on the AMD Kria KR260 Robotics Starter Kit. Through this demonstration, users can configure and test SHA-3 and SHAKE cryptographic hash algorithms in real-time. The demo enables both Functional Hashing of custom user messages and High-Speed Performance test via a standard serial console.
1 Environment Setup
To operate SHA3 demo, please prepare following test environment.
1) FPGA development board.
2) Test PC.
3) Micro USB cable for JTAG and UART connection connecting between board and Test PC.
4) Vivado tool for programming FPGA installed on Test PC.
5) Serial console software such as TeraTerm installed on PC. The setting on the console is Baudrate=115200, Data=8-bit, Non-parity and Stop=1.
6) Demo configuration file (To download these files, please visit our web site at www.design-gateway.com)
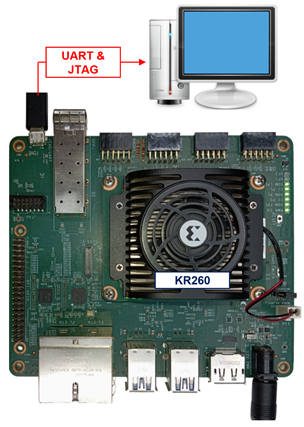
Figure 1 SHA3 demo environment on KR260 board
2 KR260 Board Setup
1) Make sure power switch is off and connect power supply to FPGA development board.
2) Connect USB cable between PC to JTAG micro USB port.
3) Power on the system.
4) Download configuration file and firmware to FPGA board by following steps
i) Open Xilinx XSCT.
ii) Change current directory to download folder which includes demo configuration file.
iii) Run tcl script to program bit file, as shown in Figure 2.
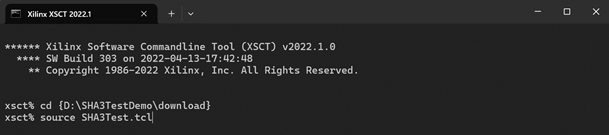
Figure 2 KR260 board setup
3 Running the Demo via Serial Console
Users can select test mode via serial console shown in Figure 3. The detailed information of each menu is described in the next topic.
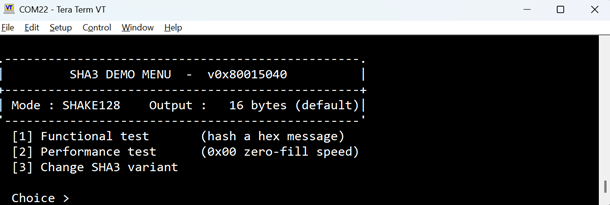
Figure 3 SHA3 demo console
4 Test Modes
4.1 Hash User Input Message
This test measures the core’s ability to hash user-provided data.
1) Select 1 from the main menu.
2) The current variant is shown in the terminal. For SHAKE variant, the terminal will prompt for the output digest length.
3) Enter the message in hexadecimal.
4) Press Enter. The firmware loads the data into the UserReg module, which clocks it into the SHA3 core. The computed hash values and metrics are output immediately. Example output shown in Figure 4.
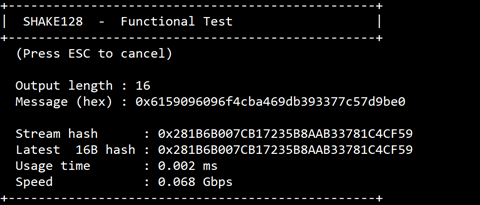
Figure 4 Functional mode test results
4.2 Performance Test Hashing
This test benchmarks the hardware throughput under sustained, full-bandwidth hashing conditions.
1) Select 2 from the main menu.
2) If SHAKE is active, specify the output digest size when prompted.
3) Enter the test size in bytes.
4) Press Enter. The system automatically triggers the hardware Constant (0x00) Stream Mode. The execution time is measured to analyze the processing capability under high data loads. Example output shown in Figure 5.
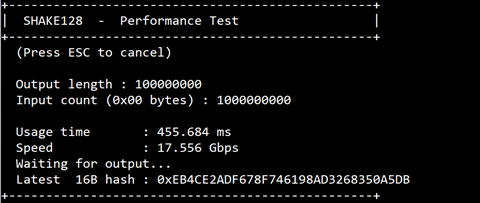
Figure 5 Performance mode test results
4.3 SHA3 / SHAKE Variant Selection
Use this menu to switch between the 6 dynamically supported algorithms as shown in Figure 6.
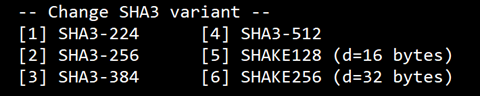
Figure 6 Variant selection menu
Enter the corresponding index (1–6). The terminal will acknowledge the selection and return to the main menu.
5 Revision History
|
Revision |
Date (D-M-Y) |
Description |
|
1.00 |
4-Jun-26 |
Initial version release. |