AAT demo with Hardware Emulation
From the previous topic about AAT Demo, Testing AAT demo by using physical hardware consumes much time in the compiling process. Therefore, it is not a practical method in the developing phase. Hardware Emulation might be a better choice when developing algorithms or hardwares.
Environment On this test
This test is conducted on AAT demo compatible with Vitis 2021.1 on Alveo card U50.
First, open the terminal for the hardware emulator and set the environment of the terminal by typing these commands.
source /opt/xilinx/xrt/setup.sh
source /tools/Xilinx/Vitis/2021.1/settings64.sh
export PLATFORM_REPO_PATHS=’/opt/xilinx/platforms’
export XILINX_PLATFORM=’xilinx_u50_gen3x16_xdma_201920_3′
export DEVICE=’/opt/xilinx/platforms/xilinx_u50_gen3x16_xdma_201920_3/xilinx_u50_gen3x16_xdma_201920_3.xpfm’
export DM_MODE=DMA
Create xo and xclbin file
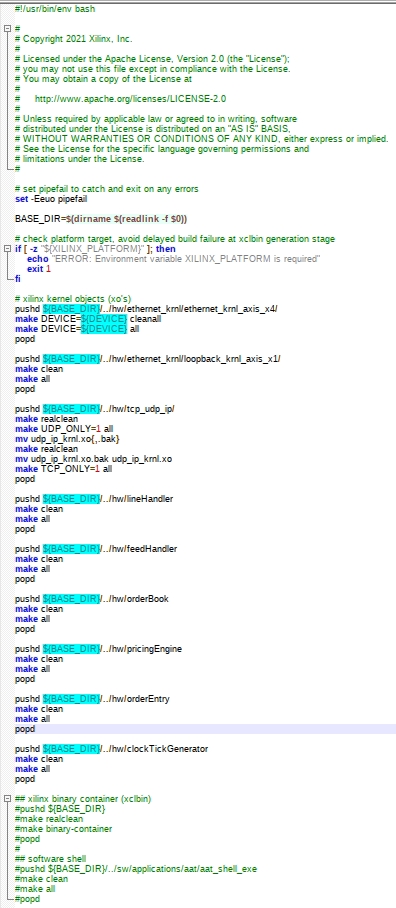
In order to decrease time spent on developing and meet the requirement of xo file. Edit buildall.sh file in folder build as shown in picture below
Create xo file by using command below
./buildall.sh
It should not take a long time depending on the processor but 5 mins at least. Then, create the xclbin by using this command.
make binary-container TARGET=hw_emu DEVICE=xilinx_u50_gen3x16_xdma_201920_3
Next, adding an environment for Hardware emulation by using below command.
export XCL_EMULATION_MODE=hw_emu
Build the software to manage AAT demo
Using the same terminal and navigating to the folder ./sw/application/aat/aat_shell_exe. Then, using the command below to generate aat_shell_exe.
make
The “aat_shell_exe” appears in folder ./build. Go to the folder ./build in order to change the name from “aat_shell_exe” to “aat_shell_hw_emu_exe”.
Using the command below to generate a mandatory file for hardware emulation.
emconfigutil –platform xilinx_u50_gen3x16_xdma_201920_3
Program Alveo card
Using the same terminal to program the Alveo card by using the command below.
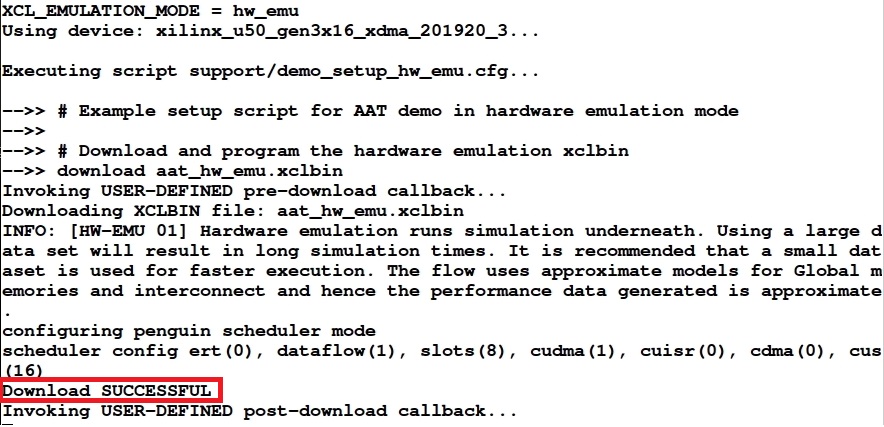
./aat_shell_hw_emu_exe -i run support/demo_setup_hw_emu.cfg
When programming the Alveo card completes. It shows the status as the picture below.
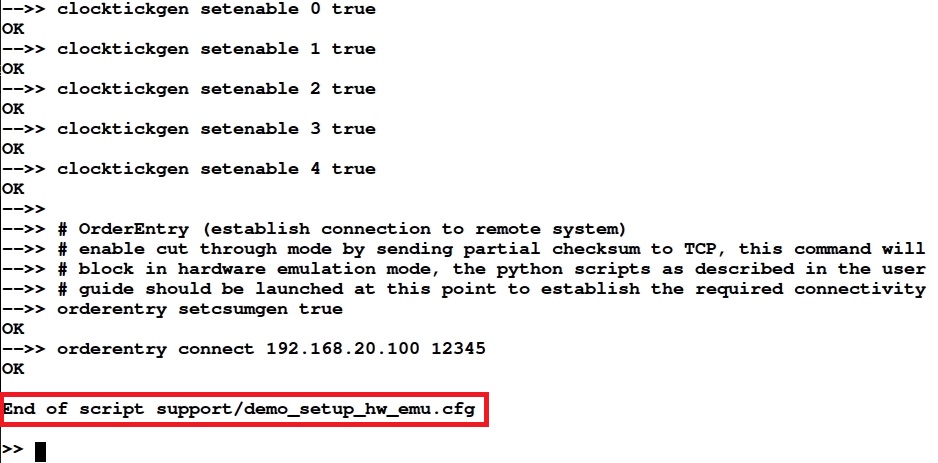
But please wait until the callback is finished by showing the message “End of script support/demo_setup_hw_emu.cfg” as the picture below. It takes 15 mins give or take depending on the computer.
Please be notice that the “getstatus”, “readata” or etc. cannot be used for now. If user uses those commands. Hardware Emulation will collapse. The Emulation will allow to operate those commands after running the python script completed.
Install python library for hardware emulation
There are 3 libraries required to complete this task. Open a new terminal for python using. Using the below command to install libraries. For a Design Gateway client, you can skip this process due to completed installation in your system.
sudo apt-get install python3-scapy
sudo apt-get install python3-protobuf
sudo apt-get install python3-six
Running python script
Open the new terminal for running python script and navigating the folder ./emulation/runtime. Next, setting up the environment as the command below.
source /opt/xilinx/xrt/setup.sh
source /tools/Xilinx/Vitis/2021.1/settings64.sh
source setup.sh
Then, run the python script by using the command below.
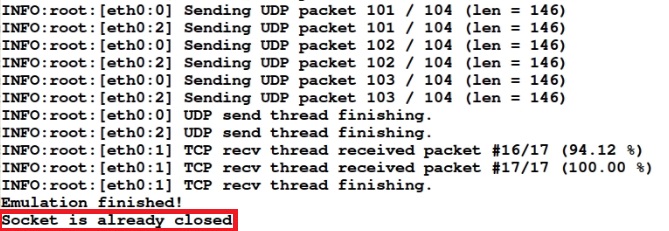
python3 aat_hw_emu.py -i ../../build/sample/cme_input_arb.pcap -o aat_hw_emu_out.pcap -s 17
Wait until the message “Socket is already closed” shows as the picture below. Then, users are now allow to use command “getstatus”, “readata” in the hardware emulator terminal.