AAT Demo Datamover with Hardware Emulation
Datamover on AAT Demo
After Both tutorial on AAT demo focusing on the running the AAT. Now, it is time to look in its features which is called Datamover. The Datamover provides a bi-directional datapath to the host. The uplink is used for transferring the updated Orderbook and the downlink transfer the requests to trade. There are 2 types of Datamover depends on environment configuration through “DM_MODE”. The first one is using DDR on Alveo card (U250) or HBM (U50) as data buffer to store data between waiting for process. Users can use this mode by set environment “DM_MODE=DMA”. The others mode is using PCIe slave bridge connecting to Host memory as a data buffer to store data waiting for process. Users can use this mode by set environment “DM_MODE=SB”. Datamover helps data management easier due to the flexibility.
Test environment
AAT demo version 2022Q1 or later.
XRT version 2.13.466.
Vitis version 2022.1
Xilinx platform version xilinx_u250_gen3x16_xdma_4_1_202210_1
Step-by-Step
The test is performed on Hardware Emulation to save the time operating. Open terminal and set environment by below commands.
source /opt/xilinx/xrt/setup.sh
source /tools/Xilinx/Vitis/2022.1/settings64.sh
export PLATFORM_REPO_PATHS=’/opt/xilinx/platforms’
export XILINX_PLATFORM=’xilinx_u250_gen3x16_xdma_4_1_202210_1′
export DEVICE=’/opt/xilinx/platforms/xilinx_u250_gen3x16_xdma_4_1_202210_1/xilinx_u250_gen3x16_xdma_4_1_202210_1.xpfm’
export DM_MODE=SB
in this article, we will shows Datamover by using Slave bridge mode.
Create xo and xclbin file
In this step is almost like the AAT demo with Hardware Emulation. Just changing the parameter make binary due to changing card as command below.
make binary-container TARGET=hw_emu DEVICE=xilinx_u250_gen3x16_xdma_4_1_202210_1
Build the software to manage AAT Demo
Using the same terminal and navigate to ./sw/applications/aat. Then, create folder “build” to store software by using below command.
mkdir -p build
cd build
cmake ..
make all
note that if cmake fail due to the version is not 3.13 or later. Fixing by changing path of library with below command.
export PATH=/usr/local/bin:$PATH
copy software “aat_shell_hwemu_exe” to ./build and navigate to ./build. Then, generate mandatory by this command.
emconfigutil –platform xilinx_u250_gen3x16_xdma_4_1_202210_1
Program Alveo card
Using the same terminal and run this command
./aat_shell_hwemu_exe -i run support/demo_setup_with_datamover_hw_emu.cfg
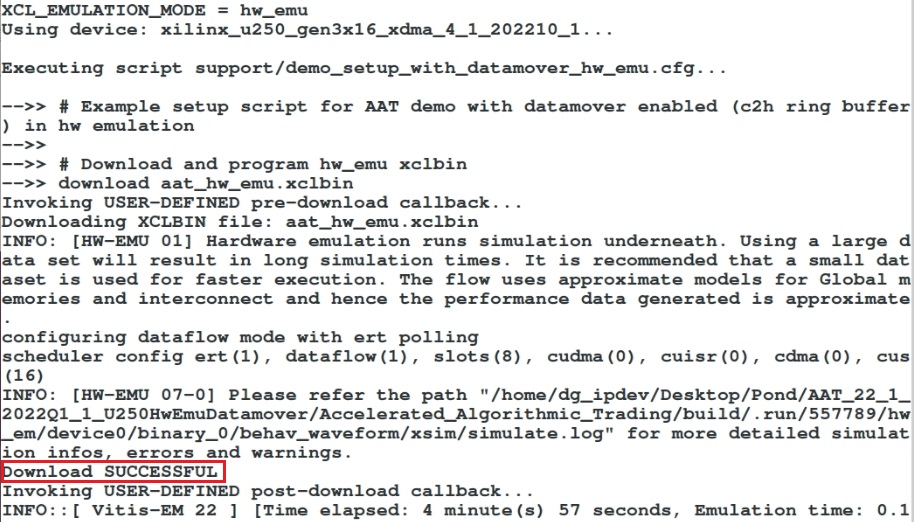
When programming the Alveo card completes. It shows the status as the picture below.
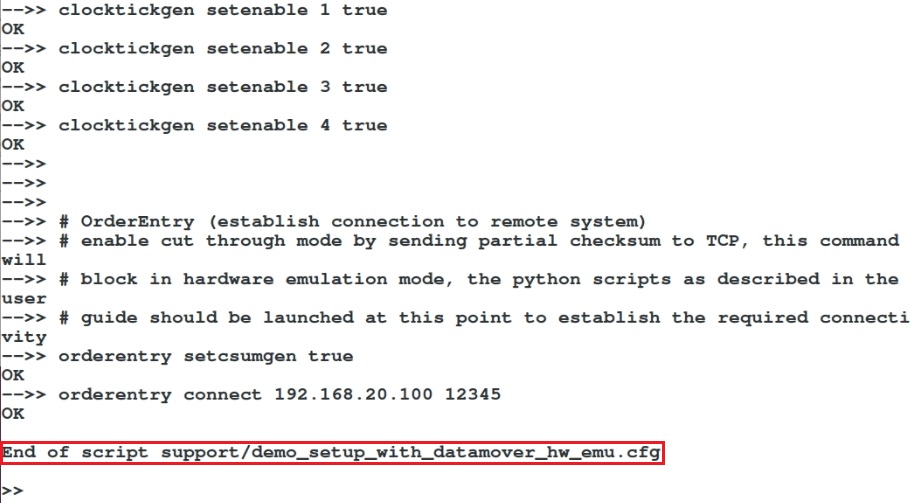
But please wait until the callback is finished by showing the message “End of script support/demo_setup_with_datamover_hw_emu.cfg” as the picture below. It takes 15 mins give or take depending on the computer.
Running python script
User can do as the previous articles in the same topic.
Result of Running Datamover
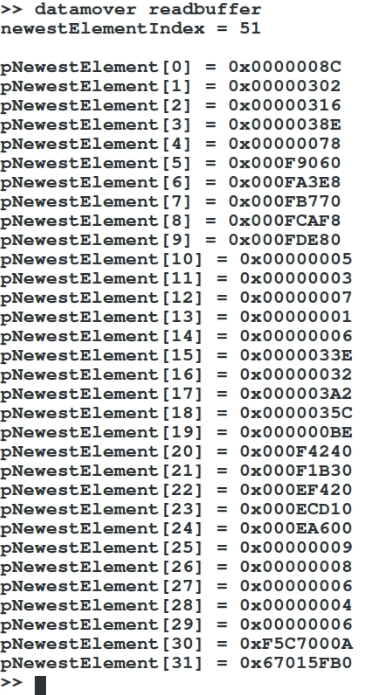
When finish running python script. User are able to run the command to access each block in AAT Demo, such as Feed Handler, Datamover and etc. In this case, the result of reading data buffer of Datamover is shown below by using command below.
datamover readbuffer
For more information, please refer to document UG1067 from xilinx.