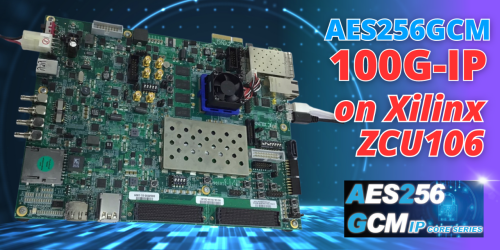
Demonstration of very high throughput and highly secure TLS transmission with DG’s TLS1.3 IP-Core
Join us for an exciting showcase of our Transport Layer Security (TLS) solution! In this demo, we highlight the utilization of DG’s security IP-core, including AES256GCMIP, to establish a secure connection using the TLS1.3 protocol.
Experience how TLS1Gdemo, designed as a client, seamlessly connects with HTTP/HTTPS servers like Node.js. Witness the demo system in action, comprising a server, web browser, and TLS1Gdemo, all interconnected over a network.
Discover the supported cryptographic algorithms and explore the various commands to set parameters, download and upload data securely.
Learn how TLS1.3 can optimize performance and free up resources for critical tasks.
TLS1Gdemo showcases the utilization of DG’s security IP-core, including AES256GCMIP, to establish a secure connection using the TLS1.3 protocol.
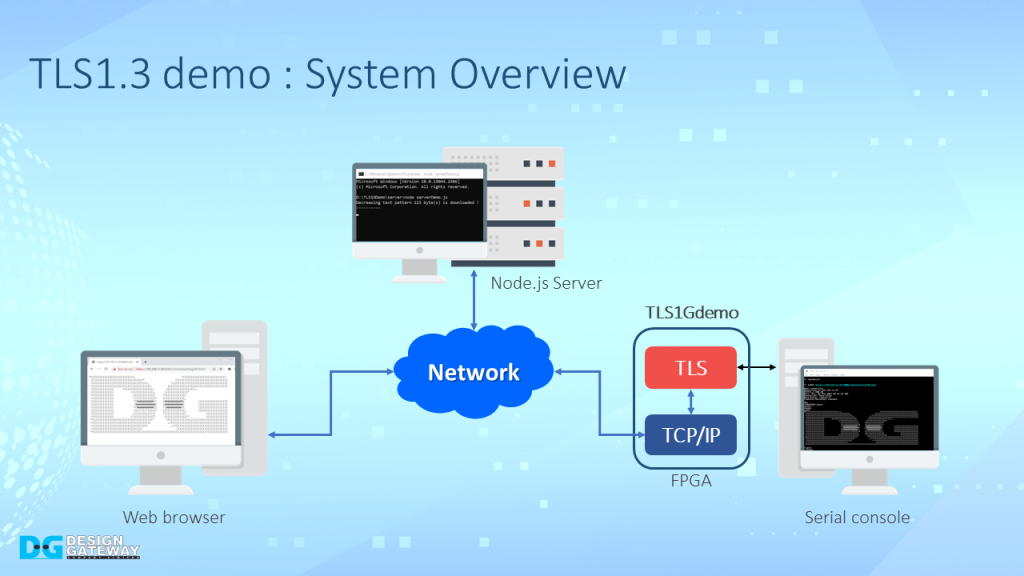
The TLS1Gdemo is designed to work as a client and is compatible with general servers like Node.js. User can use TLS1Gdemo to establish a connection with an HTTP/HTTPS server, just like with a web browser.
The demo system consists of a server, web browser, and TLS1Gdemo, all connected together through a network.
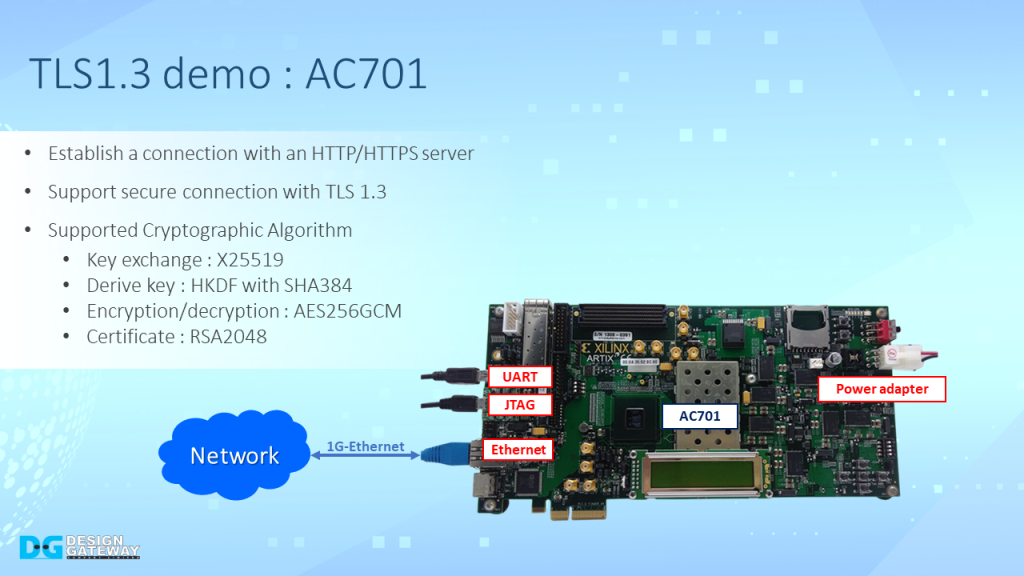
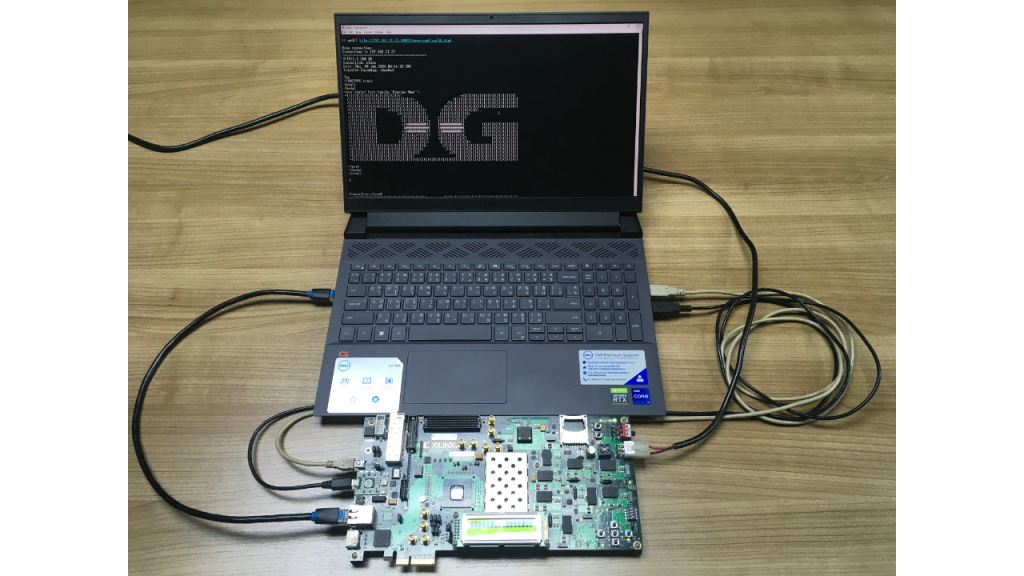
TLS1.3demo implemented on AC701 board. It is designed to create a connection with Http/https server.
For a secure connection, TLS1.3 is implemented over TCP/IP.
- The supported Cryptographic algorithm for the demo are X25519 for key exchange
- Hash-based Key Derivation Function or HKDF with SHA-384 for deriving keys
- AES-256-GCM for encryption/decryption
- RSA for certificate verification
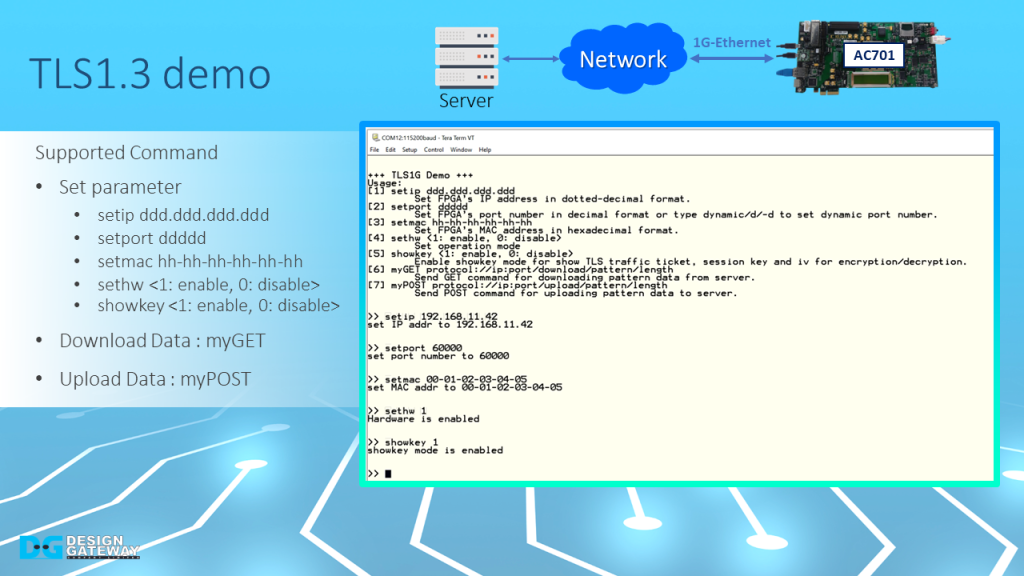
In this demonstration, users can set parameter which are, the IP address, port number, and MAC address of the FPGA board, enable hardware, enable showkey mode, and download and upload data by using the supported command.
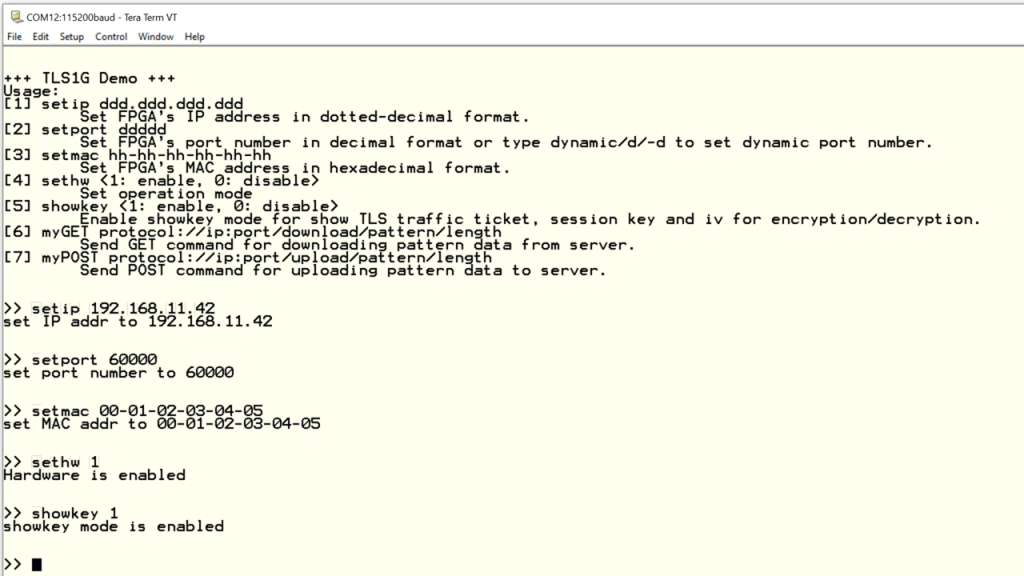
To set parameter, the user can use
- Setip to set FPGA’s IP address
- Setport to set FPGA’s port number
- Setmac to set FPGA’s MAC address
- Sethw to enable hardware for handling the connection
- Showkey to show TLS traffic ticket, session key, and iv for encryption
- To download data, myGET following by URL is used
- To upload data, myPOST following by URL is used
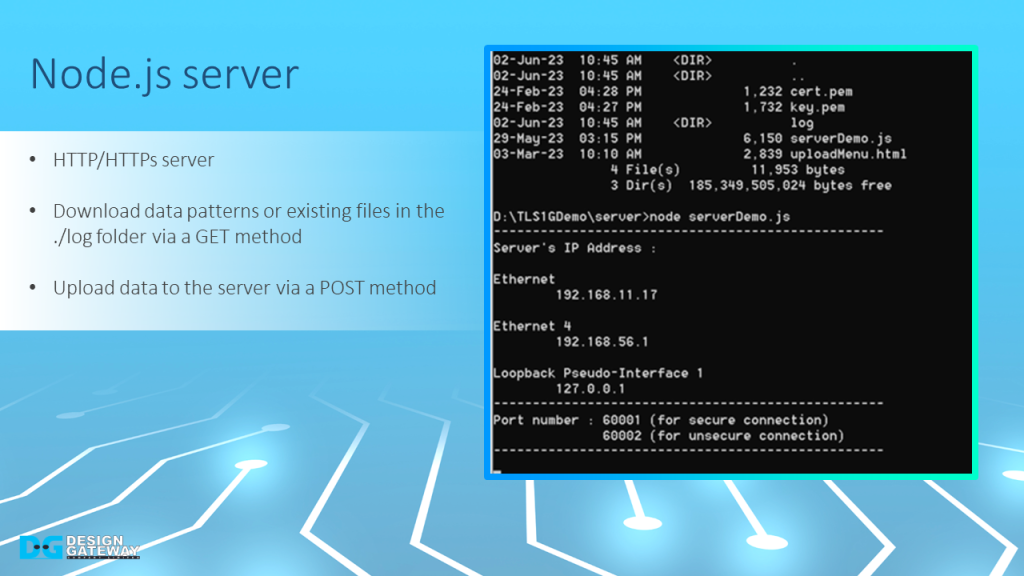
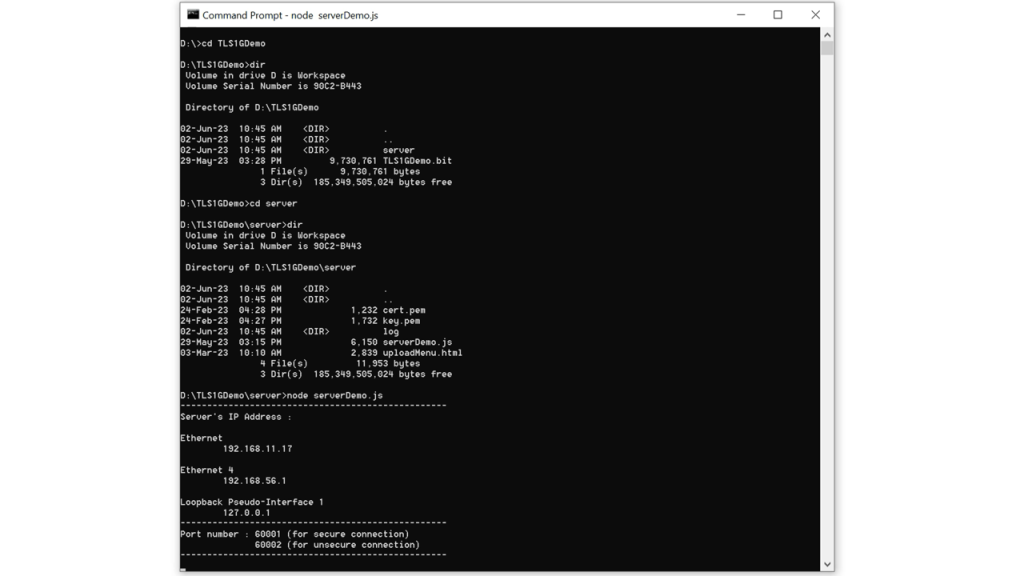
A sample server is created using Node.js that utilizes the HTTP protocol to communicate with clients.
When running the Node.js server, the server’s IP address for all network interfaces will be displayed on the console.
Clients can download data from the server through the use of the GET method, and upload data to the server via the POST method.
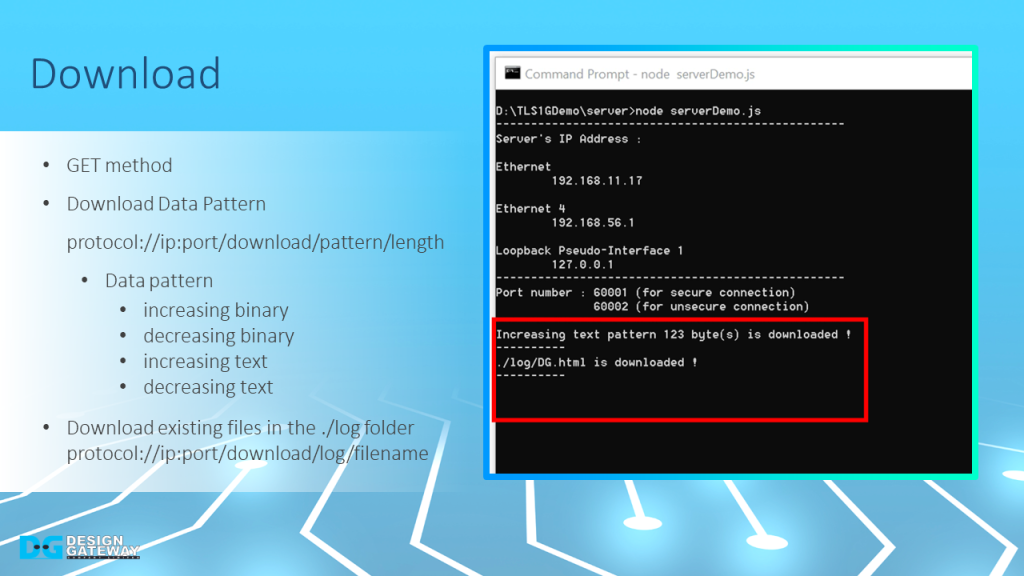
For downloading data, users can use GET method to download four different data patterns or html pages from ./log folder by inputting the corresponding URL.
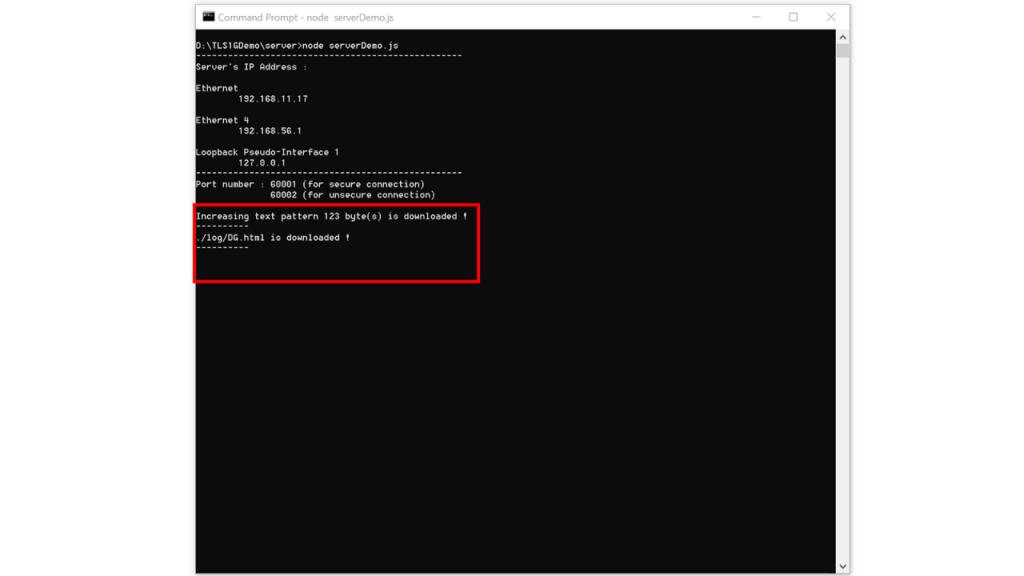
After transferring completed, the server console will display the type of requested data pattern as well as the length of the downloaded data.
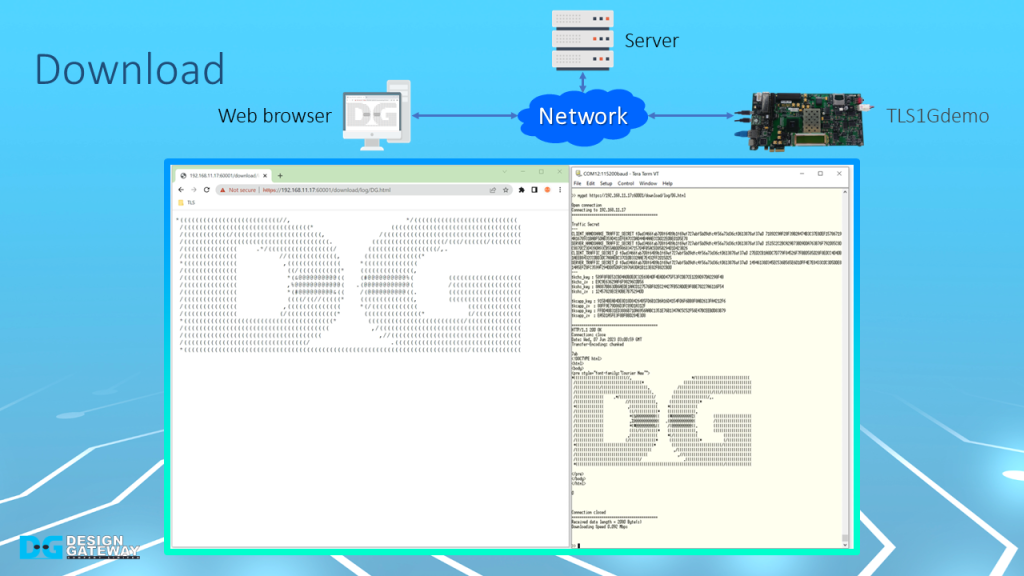
For downloading data via a web browser, when a user inputs a URL into a web browser, the requested data is downloaded and displayed.
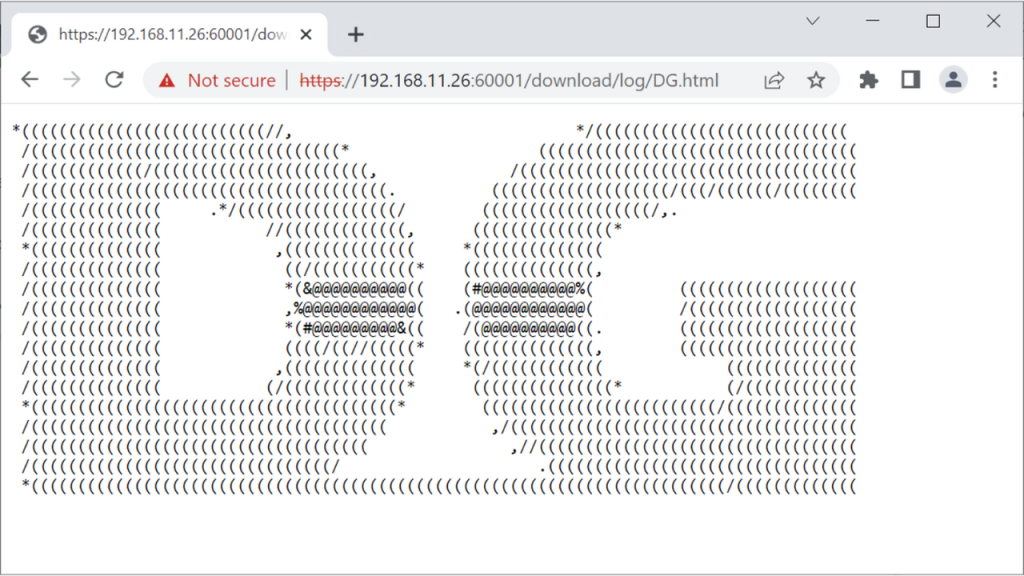
For example, if a user requests the DG.html file located in the ./log folder, the contents of the DG.html will be displayed.
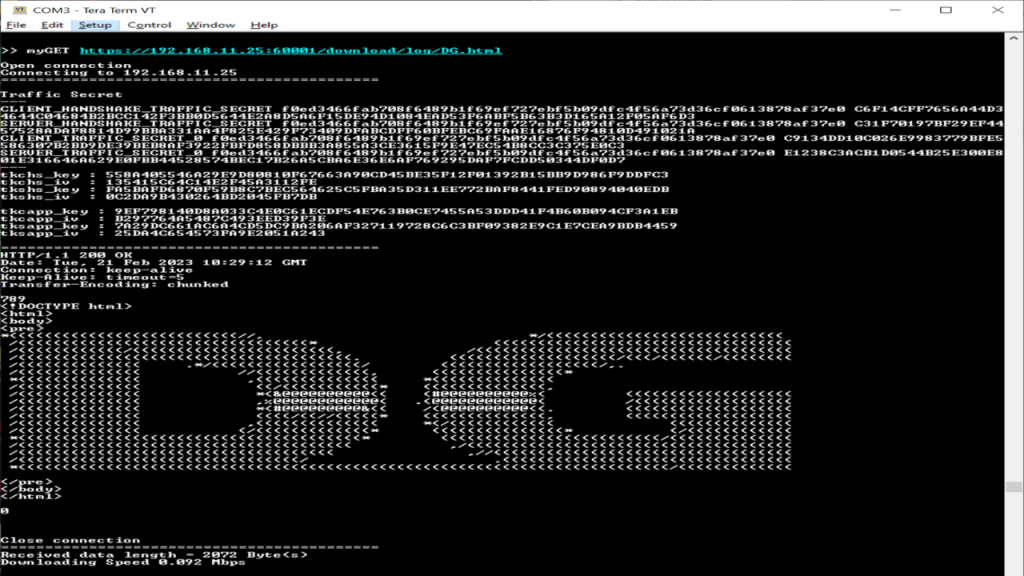
Similarly, using the myGET command followed by the same URL that was input into the web browser to download the data, you can see the same data displayed on the serial console.

For uploading data, the user use POST method transfer data pattern.
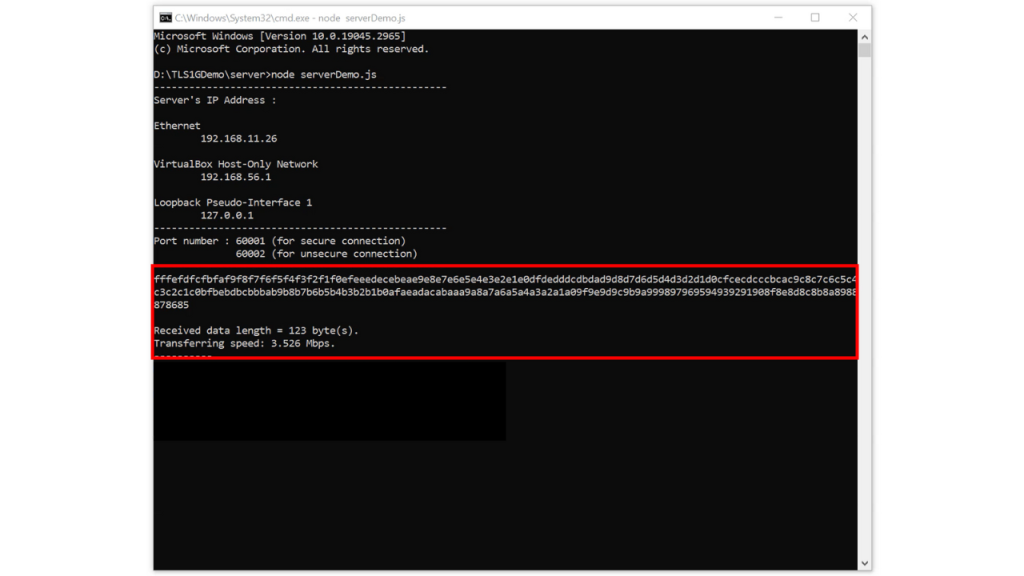
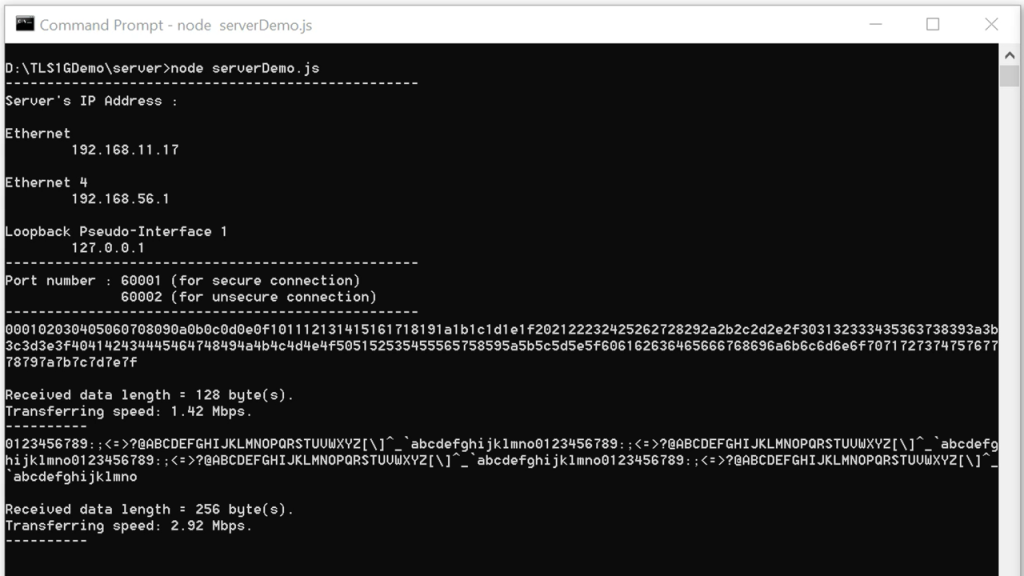
After transferring completed, the server console will display the length of the data, and transfer speed as well as the received data if the data length is less than 16 KB.
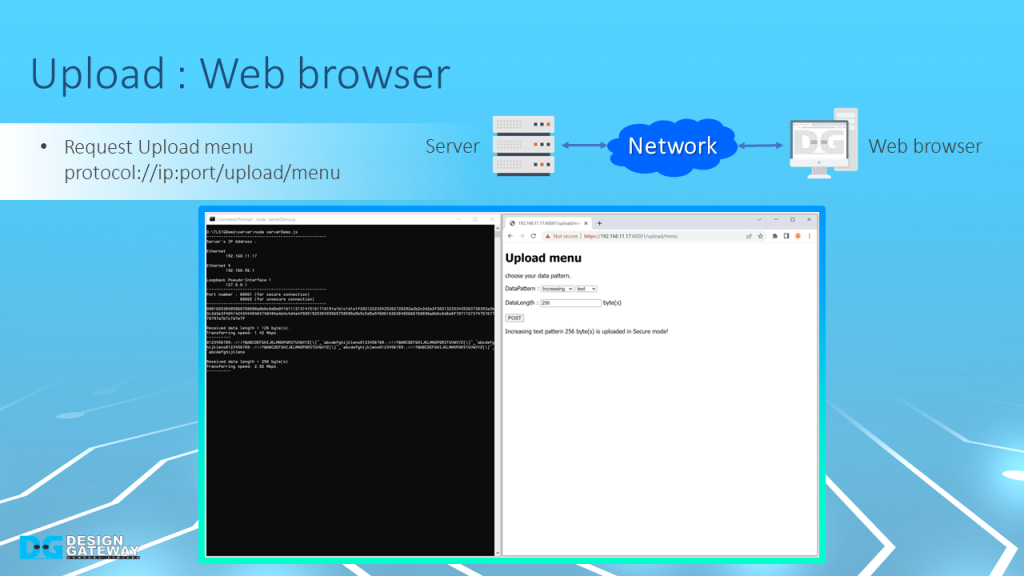
To upload a data pattern to the server via a web browser, users need to request the Upload menu to generate a data pattern, which can then be sent to the server using the HTTP POST method.
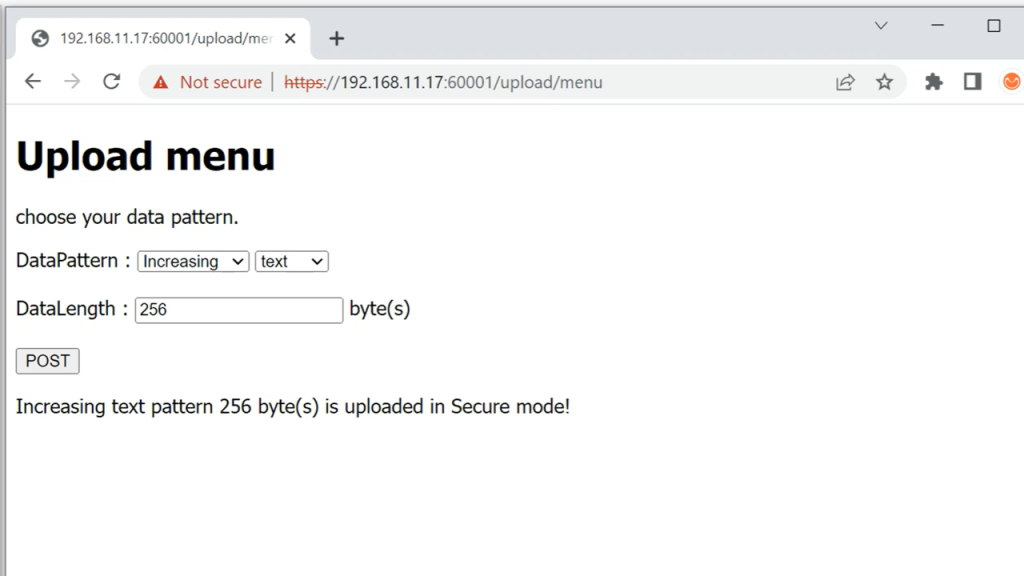
Users can select the type of data pattern and its length and then push the POST button to initiate the upload process.
Once the transfer is complete, the server console will display details of the transfer, the data length, and transfer speed. If the data length is less than 16 KB, the received data will also be displayed on the server console.
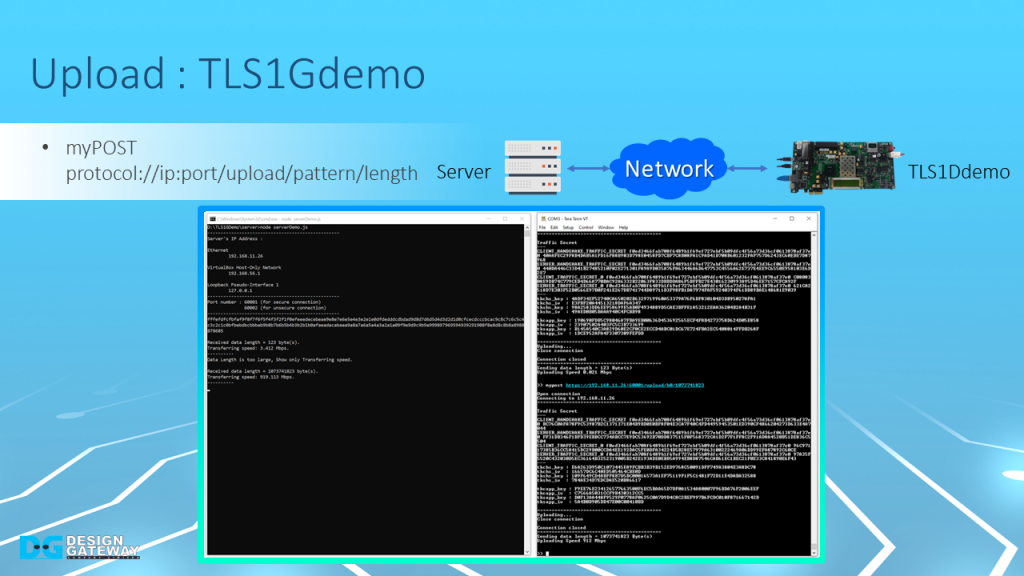
To upload data to the server via TLS1Gdemo, the user can input myPOST command followed by URL into the serial console.
This command simulates POST method of HTTP and generates a data pattern to upload data to the server.
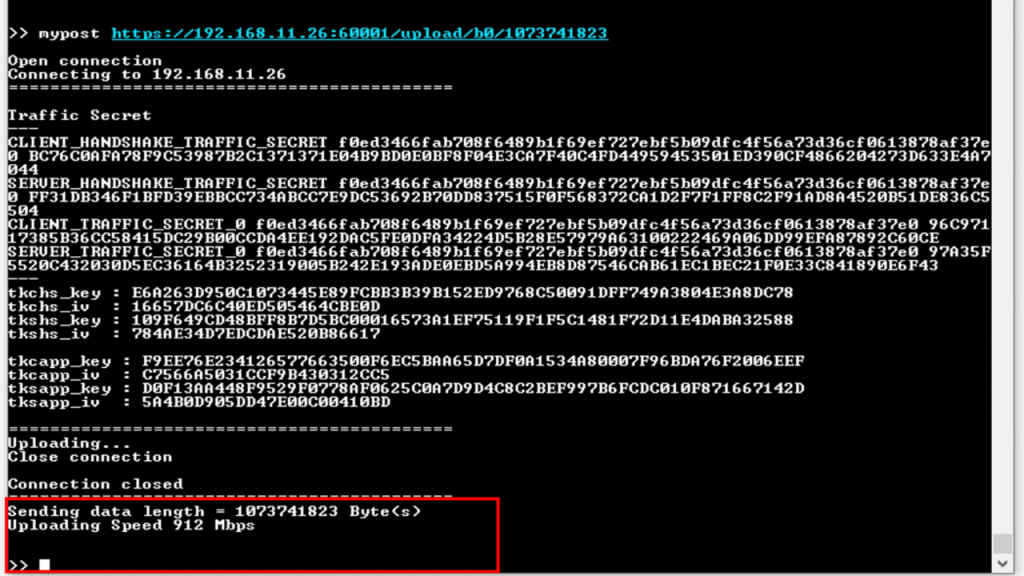
Once the transfer is complete, the serial console will display the length of the data and the transfer speed.
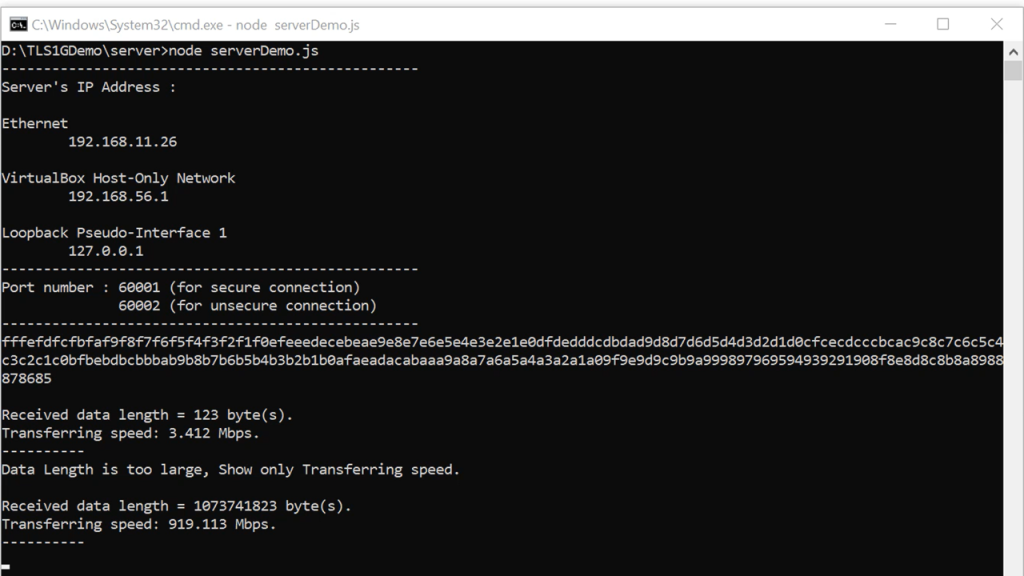
On the server console, you’ll also be able to see the data length and transfer speed. If the length of the received data is less than 16KB, it will be displayed on the server console as well.
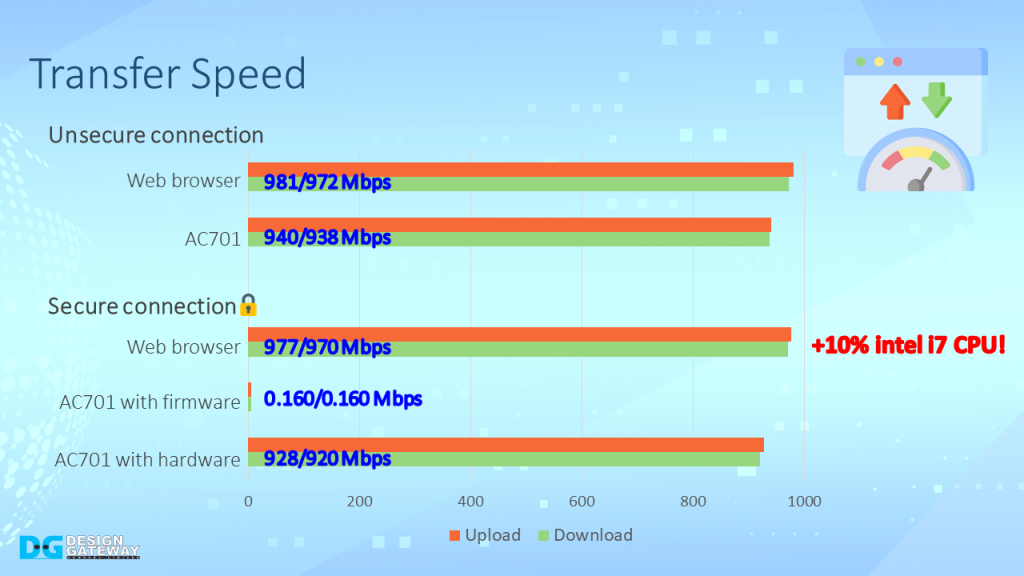
When the connection is secured, TLS1.3 protocol is implemented. The client must handle cryptographic algorithms for handshaking and transferring data.
High-performance controllers, such as the CPU on a PC running web browsers, can handle these connections with a throughput of nearly 1Gbps but consume around 10% of intel i7 CPU usage.
However, low-performance controllers, such as the Microblaze in AC701, are not capable of handling the TLS1.3 protocol to achieve 1Gbps throughput.
In fact, the transfer speed between the server and AC701 is dramatically decreased when handling TLS1.3 with firmware.
By hardware-accelerated, hardware in the TLS1Gdemo can recover the transfer speed to nearly 1Gbps and act as an offload engine, allowing the CPU to handle other tasks.
This means that not only can you secure your communication with TLS1.3 with no overhead time, but you can also free up resources for other important tasks.
For more information about our TLS 1.3 solution, please visit https://dgway.com/ASIP_E.html
Youtube: https://youtu.be/y1Lb79TN0cw
Article about TLS1.3