exFAT-IP: Unlocking Peak Performance with CPU-Free File System Revolution
Welcome to a groundbreaking revolution in file system technology. Today, we’re proud to introduce you to exFAT-IP – a game-changing innovation that redefines how we interact with file systems. It eliminates the traditional constraints of file system implementations.
Let’s explore how our exFAT-IP transforms file system implementation, achieving a new era of performance and resource optimization under FPGA technology.
What is file system?
Let’s delve into how the file system impacts our daily computing experience.
When you connect a new storage device to the computer, it initially appears as a raw partition, essentially invisible to the operating system.
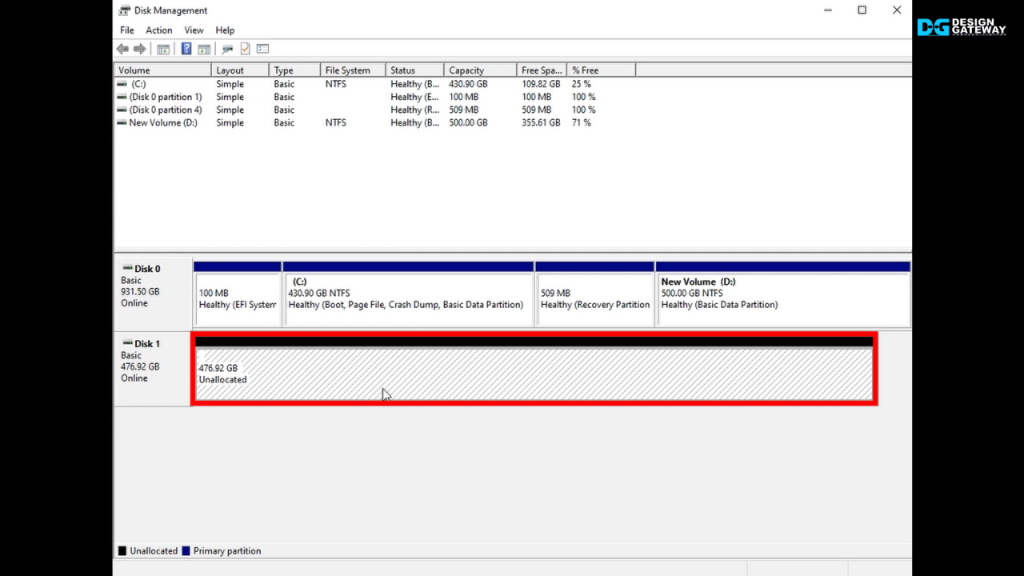
In the disk management tool, this unformatted device is seen as a blank canvas, prompting you to Format it.
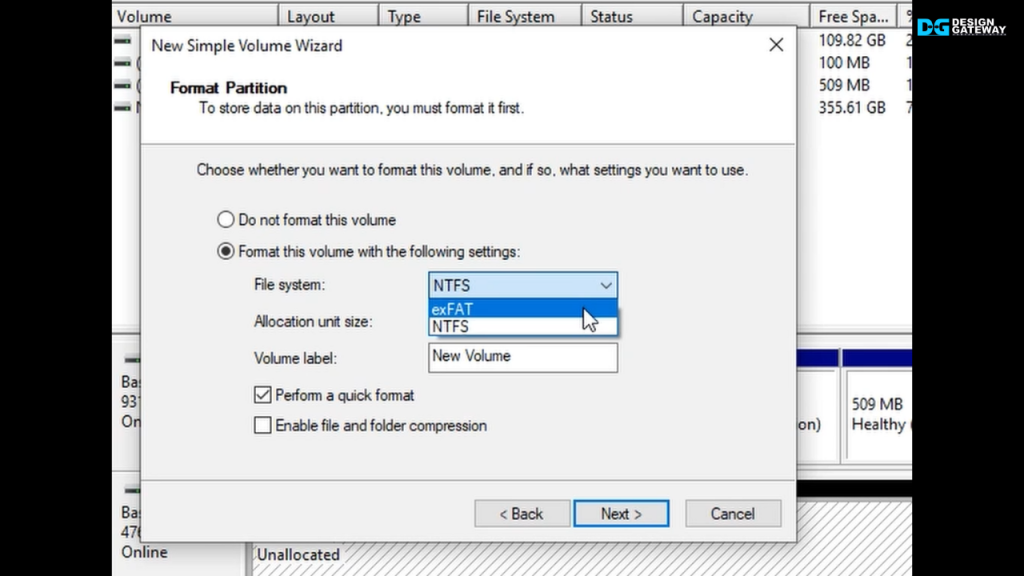
The Format tool provides the option to select the type of ‘File system’ to be exFAT or NTFS.
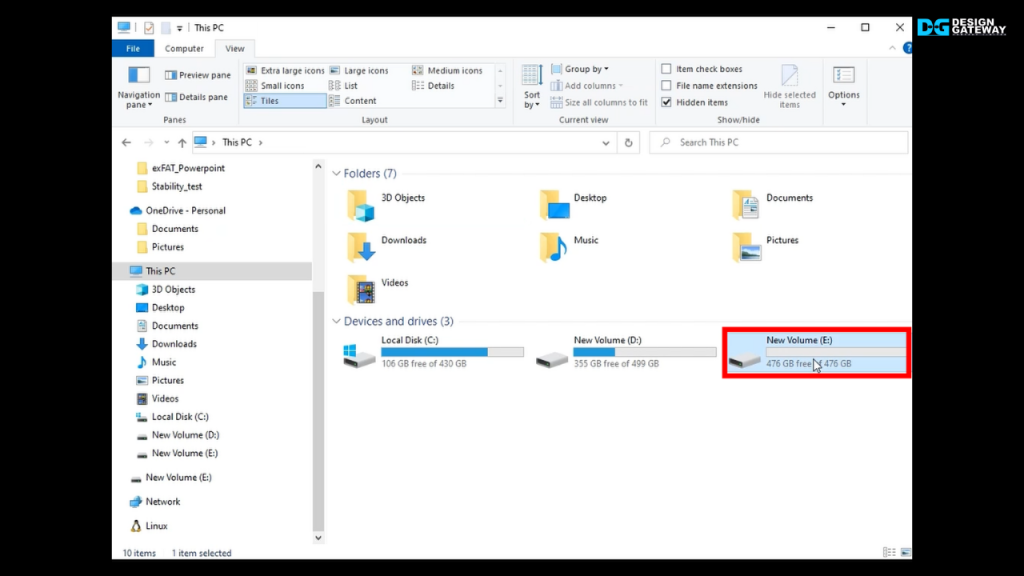
Once formatted, you can see the disk as a drive, ready to store your data. This is where the file system comes into play.
The file system allows you to organize your data in a way that is easily accessible. They can be organized neatly by folders, file names, and locations.
This organizational structure provides the solution to locate, copy, and work with your data.
In essence, the file system is the bridge that lets you interact with your data through familiar file locations and names.
How exFAT works

Now, let’s explore the process of implementing an exFAT file system in a storage device using software.
User data within the exFAT file system is divided into three main partitions, each crucial for file management.
- First is the allocation bitmap table, which designates free areas.
- Second is an area for storing file entries, including file names and modified dates.
- Last is the space reserved for actual file data.
When you create a new file, the system reads the allocation bitmap table to identify free areas.
However, when dealing with large files, it requires multiple non-contiguous free spaces.
In our example, data is distributed across three different areas, labeled as Part 0 to Part 2.
Once all data is successfully written, the allocation bitmap table is updated to mark the spaces as ‘in use’.
After this, a corresponding File Entry is created to specify crucial file information, such as the file name, file size, and modified date.
File system implementation
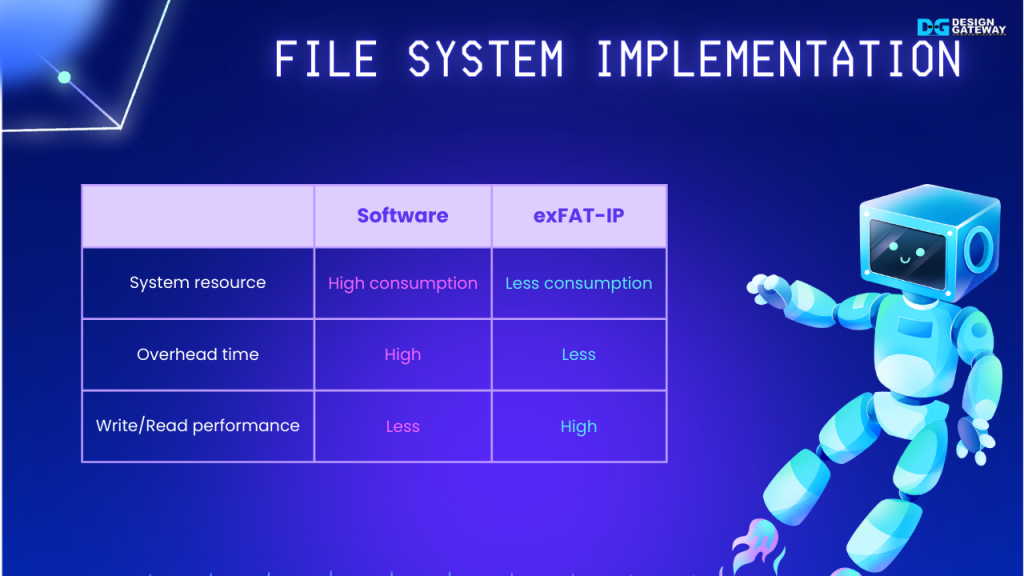
While traditional software-based exFAT implementations have been the standard, they come with their set of limitations.
Managing non-contiguous free spaces, frequently updating the allocation bitmap table, and handling large files can be resource-intensive and time-consuming, ultimately leading to constrained write and read performance for your storage device.
But there’s a solution – our exFAT-IP. It’s a hardware-based breakthrough that eliminates these constraints, unlocking peak performance without the need for a CPU or complex software.
This translates to resource optimization and significantly reduced overhead time, ensuring a seamless and efficient file system experience.
exFAT-IP Feature
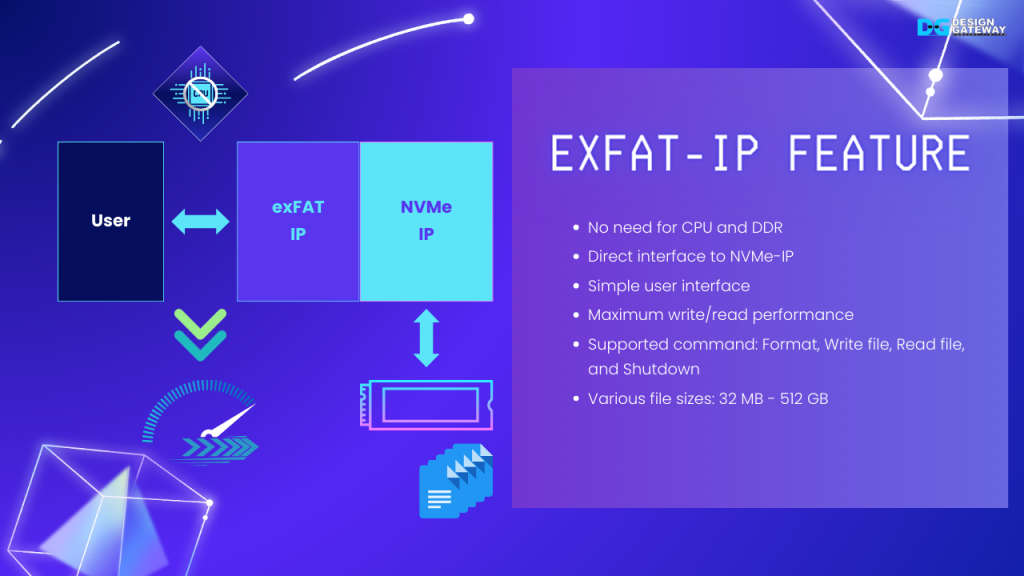
Our exFAT-IP offers many advantages when integrated into an FPGA system.
- First, it operates independently, eliminating the need for CPU or DDR integration.
- Also, it directly connects with our NVMe-IP.
- The user interface is designed to minimize signal usage, ensuring efficient and user-friendly operation.
- Notably, exFAT-IP matches the write and read performance of NVMe-IP, delivering maximum speed and data access.
- Users can select to execute Format, Write file, Read file, or Shutdown.
- And exFAT supports a fixed file size, ranging from 32 MB to 512 GB.
Next, let’s us show you the demonstration of our exFAT-IP on an FPGA board.
Demo hardware exFAT-IP
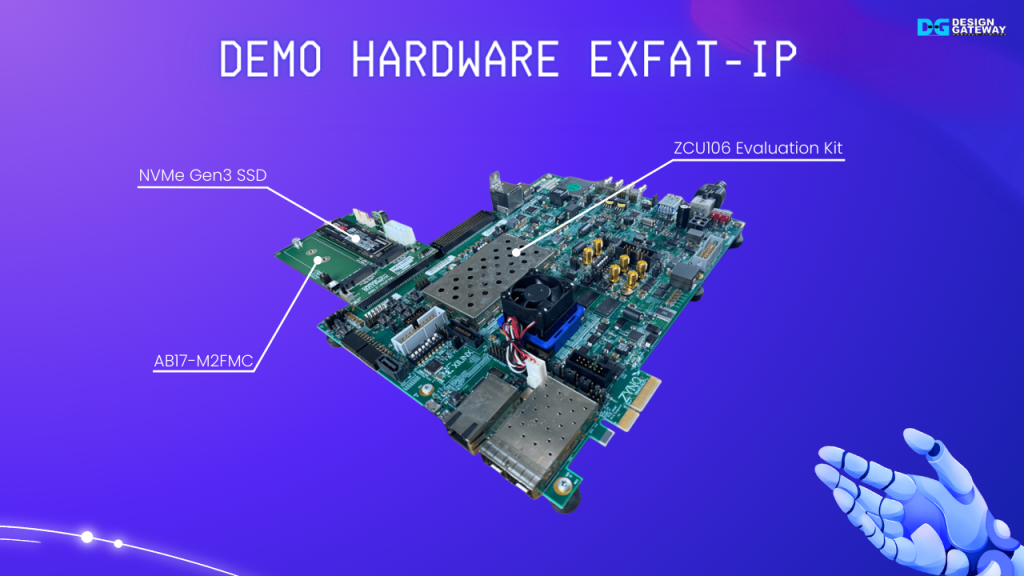
To set up the hardware for our exFAT-IP demo, you’ll need the following components:
- The FPGA board.
- The SSD adapter board.
- An NVMe SSD.
exFAT-IP Demo Setup
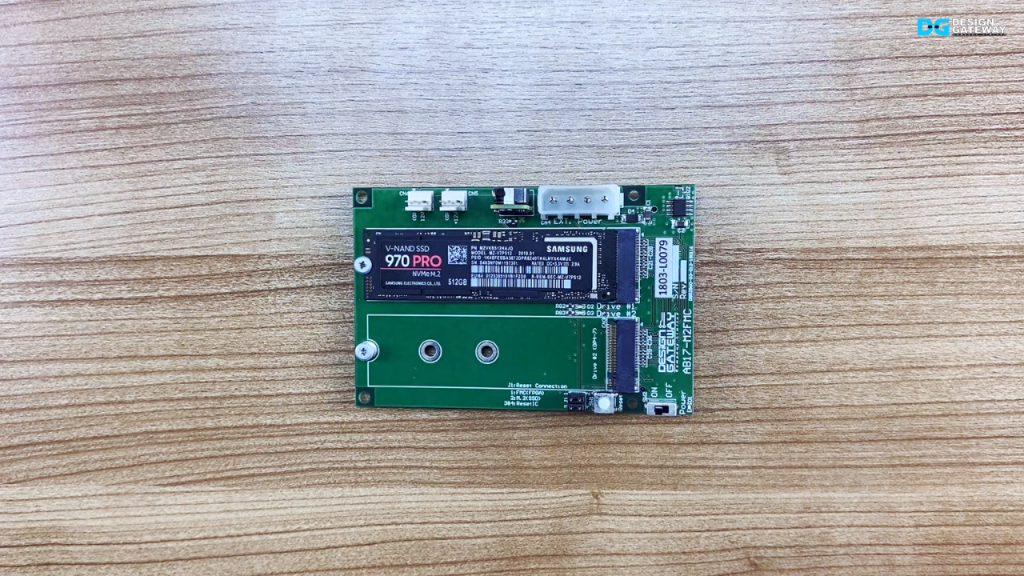
AB17 setup
- Let’s configure our demo environment.
- Begin by connecting an NVMe SSD to the Drive 1 M.2 slot on the AB17 adapter.
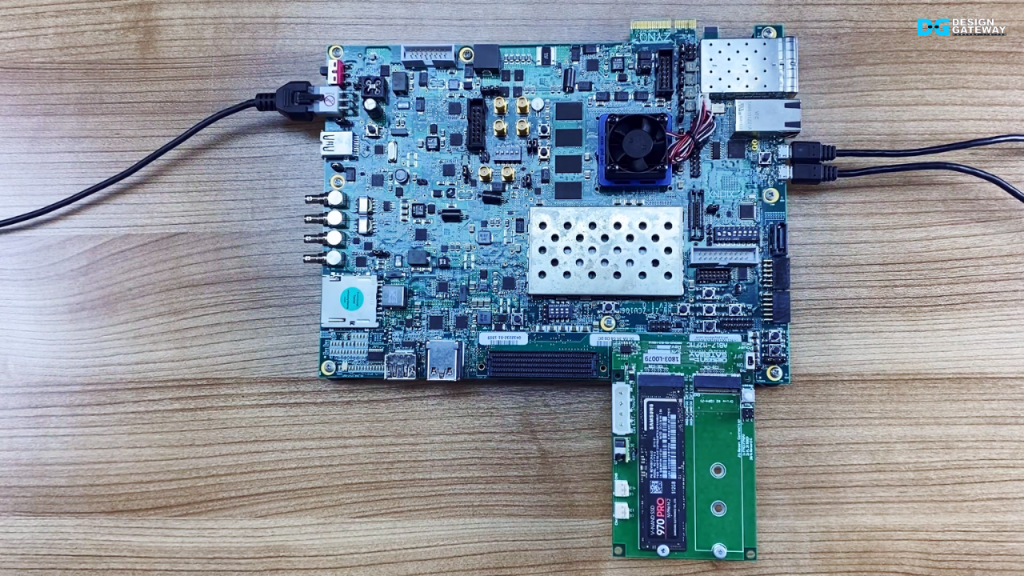
ZCU106 setup
- Next, connect the AB17 adapter to the HPC connector on FPGA board.
- Use two micro USB cables for JTAG programming and Serial console connections.
- To power up the FPGA board, plug in the power adapter.
With these connections in place, we’re ready to proceed with the exFAT-IP demo.
Demo: Format disk
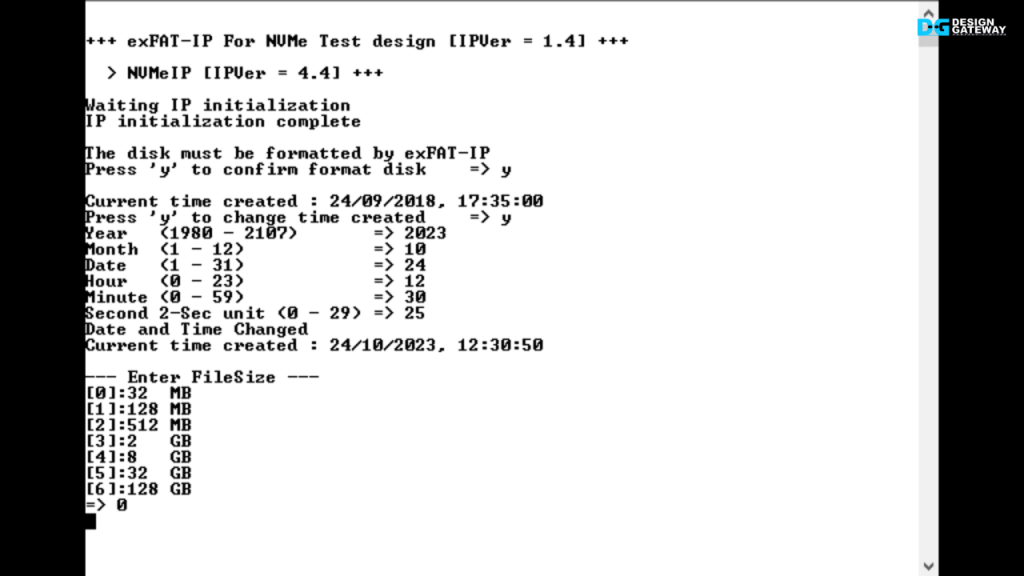
Let’s move to the live demo on the board, you can see the welcome screen.
The console prompts the user to initiate the ‘Format disk’ operation.
Upon selecting ‘Format,’ you’ll be prompted for additional parameters, including the created date and time, as well as the desired file size.
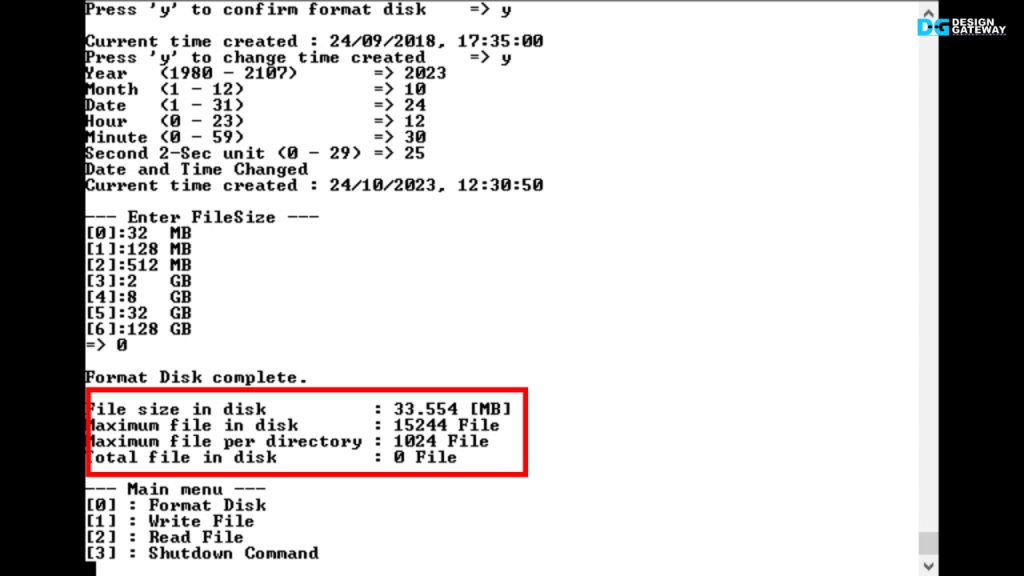
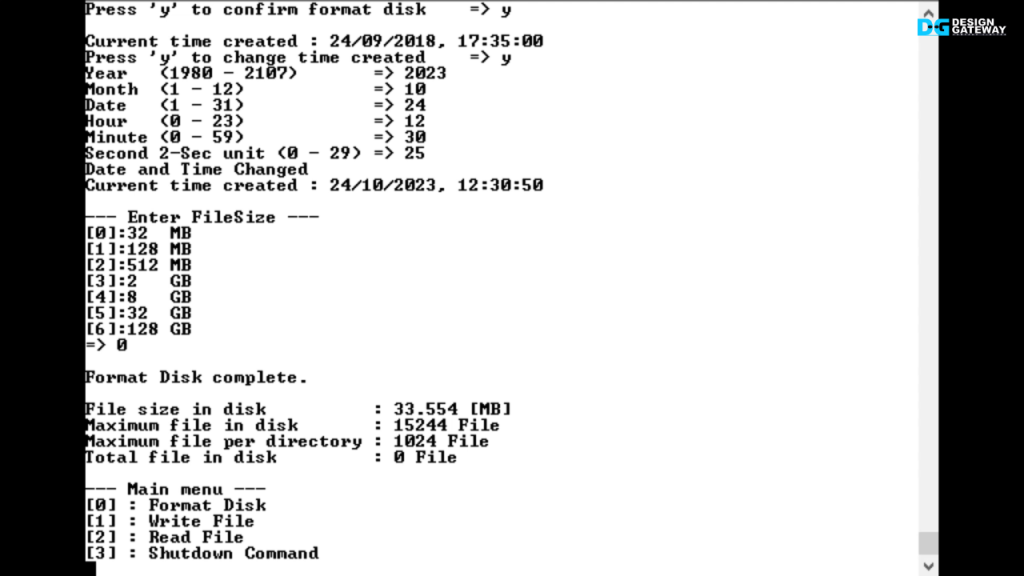
After the Format operation is completed, the console provides a summary of the results. This includes the information such as the file size, maximum files that can be stored in this device, and the maximum files per directory.
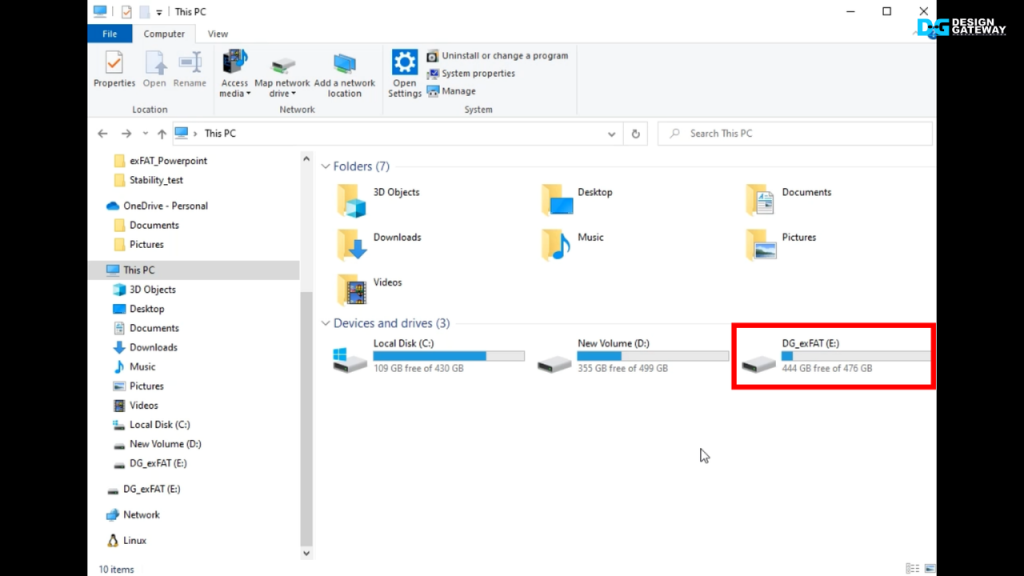
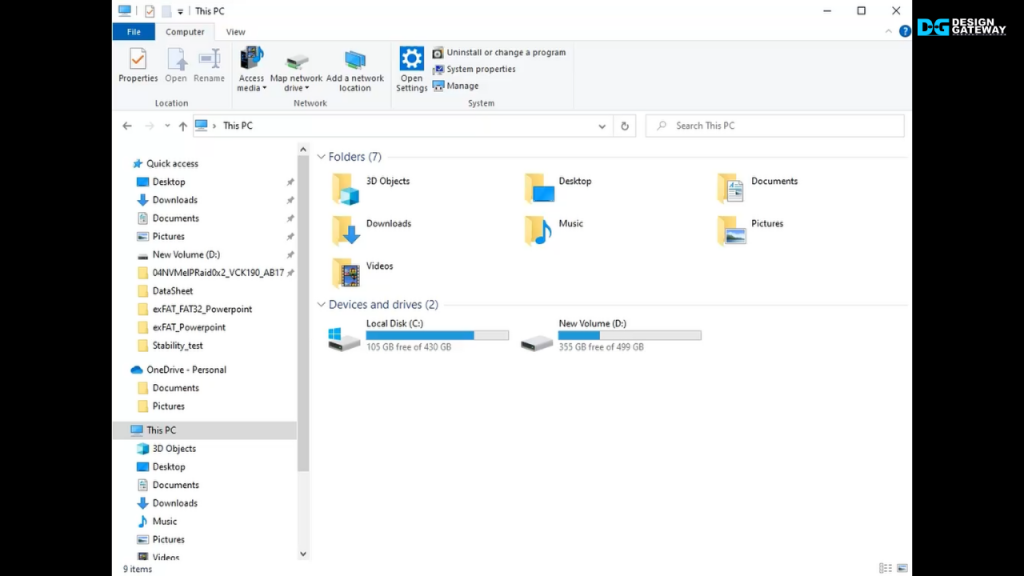
And, when you connect the disk to your computer, you’ll see a new drive labeled ‘DG exFAT’ detected and ready for use.
Demo: Write File
Let’s transition to our next demo: the ‘Write file’ operation.
In this test, users have the flexibility to set the created date and time for their new files.
The essential parameters for the ‘Write file’ operation include the first file name, the number of files, and the test data pattern.
Once these parameters are configured, the operation is initiated.
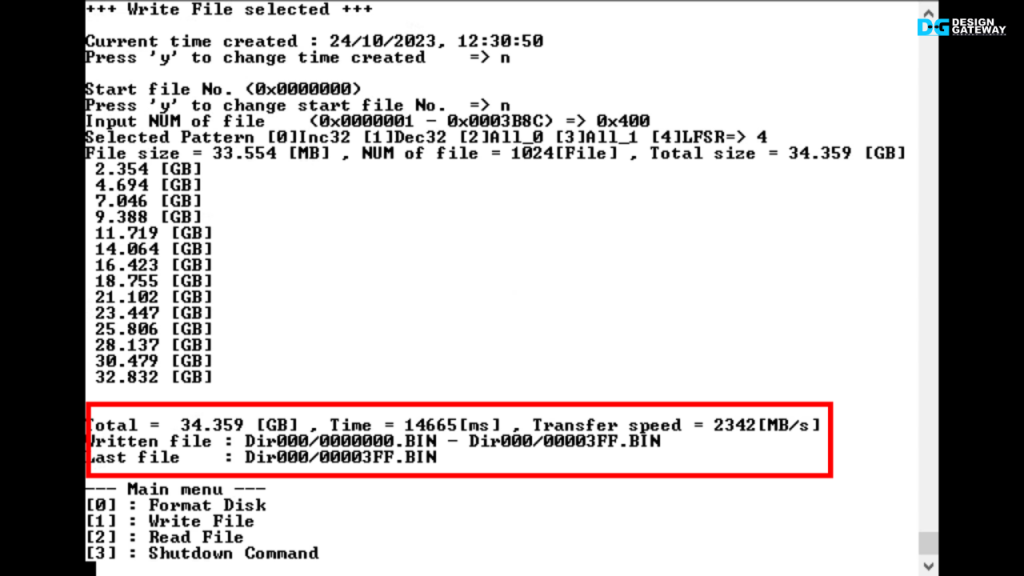
Upon completion, the console displays the results, featuring the write speed and the names of the files that were written.
The write speed reaches approximately 2300 MB/s, matching the performance when using NVMe-IP without exFAT-IP.

Upon connecting the disk to your computer, you’ll find these new files available in the ‘DG exFAT’ drive.
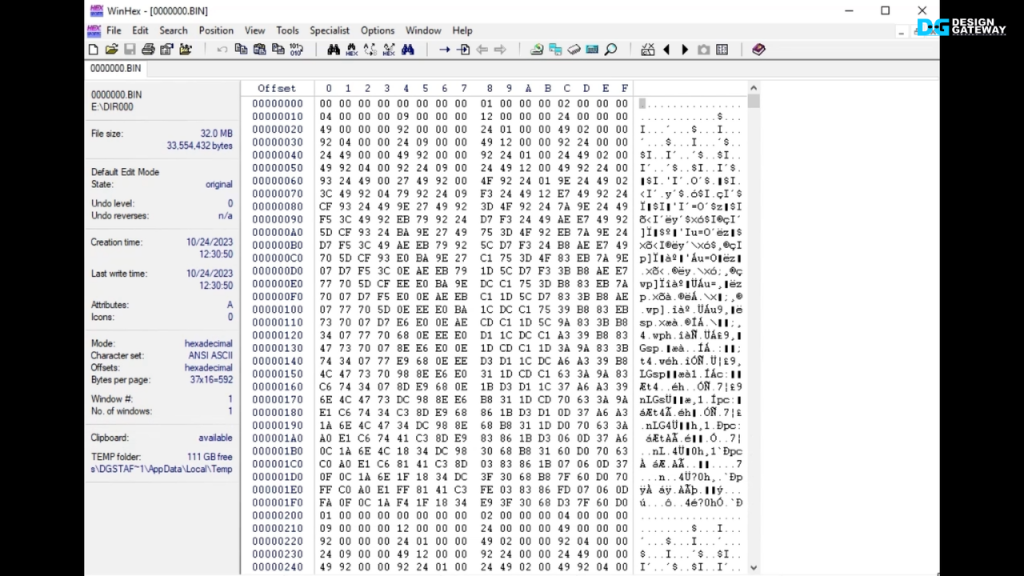
And when you open these files to read the data, you’ll encounter the LFSR data pattern.
Application: On-site Data Recorder

Using exFAT-IP transforms data sharing across platforms, simplifying the process in various scenarios.
For instance, data logging in a moving car where hardware resources are limited. With only an NVMe SSD, controlled by NVMe-IP with exFAT-IP, data logging becomes feasible.
Data is logged as a file, making it efficient and organized.

Subsequently, the SSD can be easily moved to another system, like a server. A powerful computer can then read the log data file for in-depth analysis without requiring special software.
In summary, exFAT-IP is the optimal solution for implementing a file system while conserving resources and maximizing write and read performance in an FPGA environment. It breaks through the limitations of software-based file system implementations.
For a hands-on experience of this powerful solution, visit our website or feel free to reach out to us. The demo is available, and we’re here to assist you.
👉 For AMD, visit https://dgway.com/NVMe-IP_X_E.html
👉 For Intel, visit https://dgway.com/NVMe-IP_A_E.html
YouTube: https://youtu.be/kQB_bqyZpS4
Article about exFAT-IP